I’m sort of obsessed with efficiency. Not necessarily of the mash or brewhouse variety, what I’m referring to is time, tasks, and ease: the efficiency of process! In the years I’ve been making beer at home, I’ve discovered/developed a few ways to make brewing more convenient, allowing me to brew more beer more often!
I did not develop all of the following ideas, many are techniques others who are much more clever than me have come up with that I’ve adopted to make brewing easier. The purpose of this post is to spark some ideas, not advocate for any of these tips as being the best or only way. With that in mind, let’s get to it!
Pressure Can Starter Wort
About a year ago, I read Drew Beechum’s killer how-to on pressure canning starter wort then immediately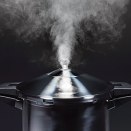 went out and bought a large pressure cooker. In a matter of a couple hours, I was able to whip up 14 quarts of 1.040 OG starter wort, which would sit on a shelf in my garage awaiting use. When it came time to make a starter, all I’d do is pour however much wort my preferred calculator said I needed into a sanitized flask and pitch the yeast, it couldn’t be much simpler. I recently read that Mike Tonsmeier of The Mad Fermentationist uses pressure canned wort to wrangle wild yeast and bugs for experiments, which is badass! I realized a caveat to this method is that it seems to work best for folks who brew less often than me– at 4+ batches per month, often using lager or hybrid yeasts, and overbuilding starters for yeast harvesting, I was blowing through 8-10 quarts for every brew day. However, I still view it as being a very effective way for a majority of homebrewers to shave some time from their brewing preparation. If pressure canning isn’t for you…
Boil Starter Wort for Less Time
After posting my yeast starter how-to, I received a message from a dude who suggested I try making a no-boil starter, just mix DME with hot water in a sanitized flask, chill, then pitch yeast. While I have yet muster the courage to try this (let me know if you do), I have started boiling my starter wort for only a couple minutes before chilling and pitching, it has worked great for well over 20 starters! I definitely have plans to try the no-boil technique at some point… later.
Prepare the Day Before
It feels so good to wake up knowing everything is ready and waiting to be used to make beer, all I’ve to do is throw on some old clothes (optional), walk to the garage, and get the fire going under my kettle. The evening prior to every brew day, I gather all of my water, mill grains, pull out my brew day tchotchkes (whisk, refractometer, spoon, hop scale, etc.), and set up my mash tuns. The next morning, I’m usually
 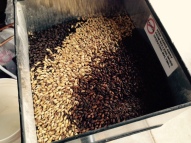 mashing in within 20 minutes, cup of coffee in hand. Even for those who brew later in the day, your milled grains won’t stale in 24 hours, especially if you keep them in a fairly airtight container (I use buckets with gamma lids). This simple change in my process has contributed greatly to making brewing a more relaxing and enjoyable activity.
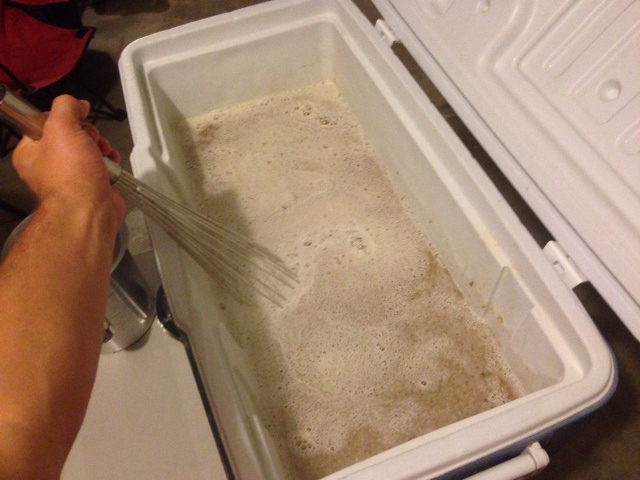
No-Sparge
I’ve started utilizing the no-sparge method nearly every time I make a 5 gallon batch of beer. If I had MLTs large enough to fit the grains and brewing liquor required for bigger batches, I’d use it there too, it’s so incredibly convenient. Brew In A Bag is usually categorized as a no-sparge approach, though some folks do rinse their grains following the mash… I don’t. The beauty of no-sparge methods is that you get to skip heating sparge liquor and collecting a second runoff, which for me means a 15-20 minute reduction in time. Sweet! The only consideration is a slight hit to your efficiency- I get about 75% with no sparge, 3% lower than when I batch sparge, which is negligible in my book. If your kettle isn’t large enough to fit all of your brewing liquor, that’s fine, start mashing with whatever amount will fit, then heat the remaining portion to about 175°F and add it with 10-15 minutes left in the mash. Bada-bing, bada-boom.
Reduce Mash Length
 It’s true that the longer grains remain in the mash at saccharification temps, the more conversion occurs. But not much, at least after the 30 minute mark. In my xBmt comparing 60 minute and 30 minute mash times, there was no compelling evidence tasters were able to tell a difference between the beers, even the OG and FG were the same. If your goal is to get in and out of the brewery as quickly as possible, shaving 15-30 minutes off of your mash time will likely have little if any qualitative impact on your finished beer. I know this sounds scary and goes against convention, but I’ve done it quite a few times and not a single person has been able to tell the difference. This technique seems to work best for mashes that are 150˚F or warmer.
Clean As You Go
I’ve heard so many stories of people who go out to their garage a few days after brewing to discover a mash tun full of nasty grains. I’m the type of guy who hates having shit hanging over my head, to the point of neurosis, I can’t even come close to understanding how a person forgets to clean their mash tun. Immediately after I’m done collecting my sweet wort, while I’m waiting the 15 minutes or so for it to come to a boil, I spend 4 minutes cleaning my MLT so that I don’t have to worry about it later. I do this with everything as soon as I’m done using it. My MLT cleaning regimen consists of blasting it with the “jet” setting on my hose nozzle and wiping away grain bits with my fingers– no soap, no OxiClean, just water and fingers. I will take a scrub pad to my kettle after each brew day in order to remove the rim of gunk plastered to the top. I easily spend the most time, maybe an entire minute, ensuring my valves are well rinsed. Once every 6 months or so I will give my kettles a good scrub with Bar Keepers Friend, this stuff is amazing when it comes to cleaning stainless steel, and it works well on porcelain too!
Prepare Hops, Finings, and Other Boil Additions During the Mash
I t’s easy for me to get caught up doing inane stuff (like reading a blog) after mashing in, only later, as I’m scurrying to get my kettle additions measured out in time, wishing I’d spent that time preparing a little better. I’m a bit wary of weighing out my hops the day before brewing, so I usually do it toward the end of my mash, that way they’re only sitting out for about an hour before being tossed into the wort. I separate each addition into it’s own vessel and label them with the time it’s supposed to be added to the boil. If I have a hop addition between 15-5 minutes left in the boil, I’ll toss whatever kettle fining I’m using into that same cup.
Use FermCap-S
Most homebrewers I know brew in volumes that just about top-out their kettle. Unless you’re a fan of cleaning up sticky caramelized wort, you really should be using FermCap-S. Three drops per 5 gallon batch and 5 drops per 10 gallon batch works wonders! Also, I use just a single drop to safely boil starters in an Erlenmeyer flask without risk of a volcanic eruption. At these usage rates, a $4 vial should last most homebrewers 3+ years, pretty cheap insurance.
Ditch the Hop Bags/Socks
Filtering out kettle hops only adds another item to clean while contributing little, if anything, positive to your finished beer. When I first started brewing, I somehow became convinced that clear wort in the fermentor led to better beer, so I used large paint  strainer bags to filter out kettle hop additions. After analyzing the surprising results from The Great Trub xBmt, I’ve since abandoned this practice and haven’t noticed any degradation whatsoever in the quality of my finished beer, in fact most seem to clear even faster these days. For brewers who push wort through a CFC/plate chiller, hop filtration in the kettle will reduce the chances of a clog, so this may not be the best advice for you. In addition, I never filter dry hop additions either, just throw them directly into primary, leave them for a few days, cold crash for 24-48 hours, then package. It works great and the beer comes out just as clear!
Forgo Hop Additions During the Boil
Bittering at 60, flavoring at 30, aroma at 5. This is what I was taught about hop schedules when I first started brewing, it was the standard, everybody did it. Over the last decade, thanks to the growing love of all things hoppy, we’ve developed less conventional methods of utilizing this delectable flower that produce incredible flavor and aroma. The majority of the evidence I could find supports the notion that first wort hop (FWH) additions tend to produce a smoother and less harsh bitterness than traditional 60 minute boil additions (xBmt planned to test this), while an abundance of hops at flameout impart intense aroma and flavor along with some bitterness. By combining these methods, one is able to spend 60-90 minutes cleaning up, relaxing, or running through the Taco Bell drive-thru. The first time I did this, I was nervous the resultant beer would have poor hop character, but to my surprise, the hops shone brightly and the beer ended up taking first place in a local comp! I’ve since used this technique many more times to produce tasty beers.
Get a Burner that Will Grow With You
There are many options to choose from when it comes to selecting a burner, make sure you pick one that best suits your brewing needs. If you make, or plan to start making, 10 gallon batches, get a burner that works well for that volume! I was one of those guys who purchased 3 burners before eventually settling on the model I use today, telling myself with each purchase, “these will suffice.” They did until they didn’t and I ended up eating the costs. Do yourself a favor and get a good burner that will grow with you right off that bat, this hobby only gets more addicting with time. To read some of my thoughts on a number of burners, check out my Brewing With Gas article.
Utilize Proper Chilling Techniques
Chilling a 5 gallon batch of beer with an immersion chiller should never take more than 20 minutes. When I first heard this, I was a bit bewildered, as my chill time using a 25′ x 3/8″ copper IC plopped into hot wort with the 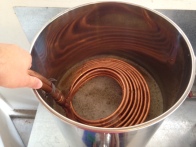 water slowly flowing was closer to 45 minutes. The primary reason I bought a pump and plate chiller setup was to reduce my chill times, perhaps a few readers can relate. Not long after making this change, I realized how much I hated all that was involved in this new setup and reached out to JaDeD Brewing seeking advice on how to use an IC more efficiently. I learned 2 important things from that exchange:
1. Keep source water flowing at full blast
2. Constantly agitate the wort by stirring and/or moving the IC around
The following brew day, I was ecstatic to reach 6°F above groundwater temperature in under 10 minutes! Times will vary depending on the type of IC you use and the temperature of your source water, but employing these 2 techniques will absolutely reduce your chill times. For users of CFCs, faster source water flow rates will improve your chilling efficiency as well.
Skip Transferring to a Secondary (most of the time)
I believe it was Sam Pink who said, “If I ever find a dead horse, I’m going to beat the fucking shit out of it,” a sentiment I experience every time the topic of whether or not racking to secondary is worthwhile. No, I couldn’t care less if others use a secondary, but I have no qualms referring to it is a hugely unnecessary step in brewing that’s most likely a remnant of our shitty-yeast past. Not only do some of the biggest names in the industry advocate for primary-only fermentation, but results from my recent xBmt suggests it makes no difference. While I have yet to formally test it, I do have quite a bit of experience adding other ingredients directly to primary including cacao nibs, vanilla, fruit, and coffee– it works just fine! If you like to bulk age big beers for longer than 5 months, racking to a second vessel may be of some benefit. I’ve even left sours in primary for 12+ months and they came out fine.
Don’t Drink and Brew… Too Much
As a morning brewer, my usual brew day beverage is a hot cup of coffee. The few times a year I brew later in the day are usually because someone wants to come over to watch, assist, learn… and drink my beer. I’ve no problems with sharing, not one bit, I do it often, and I especially like imbibing with those I’m sharing with. We’ve all been there:
Mash-in… time for a beer… runoff and sparge… that Pale is delicious… let’s get this thing to a boil… mmmmm, beer… boilover, shit, forgot the FermCap… I can’t believe I made this deliciousness… was I gonna add hops at some point?
I remember one brew day where the boil timer went off, I silenced it, then got back to shootin’ the shit with some buddies before turning the burner off. It took 15 minutes for me to remember the timer had gone off and I hadn’t cut the flame. Not only do we run the risk of screwing up a batch of beer, but brewing while drunk can be quite dangerous. I don’t have any hard and fast rules for drinking while brewing, though I’ve learned I tend to do better when I hold off on pouring that first pint until my wort is boiling.
Fine with Gelatin
I’d heard of people using gelatin as a way to get their beer clear, but for some reason I was hesitant to try it for myself. I decided to give it a go after comparing beers with a few friends who all used the same ingredients and brewed on the same date, the one person who fined with gelatin served a beer that was remarkably brighter than the others. I have an xBmt planned to test the impact gelatin fining has on a beer, as there is some speculation it reduces certain flavor and aroma characteristics, but one thing’s for sure- it works great for clarity! Here’s the process I’ve been using:
– Once fermentation is complete, cold crash beer to 30-32°F for 24 hours
– Combine 1/2 tsp gelatin into 1/4 cup water, microwave for 5 seconds at a time, stirring in-between, until it reaches 150° and the gelatin is fully dissolved
– Pour gelatin solution into fermentor and let sit another 24-48 hours
– Package
A single sachet of gelatin has enough for three 5 gallon batches of beer, making this an incredibly inexpensive option. I’ve yet to bottle condition a beer I’ve fined with gelatin, but I know plenty of people who have and it works beautifully, their beers come out crystal clear and well carbonated.
Keep Your Brewery Clean & Organized
There’s little more annoying to me than needing something and not being able to find it. If I need a hydrometer, a thermometer, or scissors to open a bag of hops, I want to know exactly where it’s at so I don’t waste time looking for it. Some people like to use plastic storage bins and I know a few guys who keep their smaller wares in a toolbox, both great options. I prefer shelves, personally, and I make sure to put everything back in its designated spot after each brew day. If you stock bulk grains, something that can save you time and money, make sure you label your containers so you don’t get things mixed up.
Don’t Worry So Much
You invested $40 in a Pliny The Elder clone kit, spent 5 hours brewing, pitched the starter you made a couple days prior, and got it all situated in a temp stable area for fermentation, then the self-doubt and internal questioning kicks in.
Was my yeast good? Did I pitch enough? Maybe the fermentation temperature is too high? Where is that damn krausen? Is it… infected?!
Truth is, beer isn’t all that difficult to make, people have been doing it for thousands of years. As long as your sanitation is at least decent and you added yeast to sugary wort, beer will be made, without question. Is it going to be perfect every time? Of course not, that’s why there’s a next time! Brewing is a fun hobby, not a task to be stressed about.
from Brülosophy