 My favorite beer I’ve ever brewed was my first attempt at a Pliny the Elder clone. I used the recipe from the September 2004 issue of Brew Your Own. I remember thinking the author must have made a mistake in the recipe; it called for a whopping 6.75 oz. (191 g) of dry hops. Before that beer, I had never added more than 1.5 oz. (43 g) of dry hops. But against my wallet’s better judgment, I brewed the recipe as it stood. The resulting beer was true hop heaven.
So what is it about that beer that is so striking? To anyone that has tasted or brewed a beer like Pliny the Elder, it’s the hop oils that knock your olfactory senses sideways. Nowadays I constantly strive to make my hop-forward beers better, more interesting, more complex. Thanks in a large part to groundbreaking work by Thomas Shellhammer, Nor’Wester Endowed Professor of Fermentation Science at Oregon State University and his former student Peter Wolfe, who now resides as brewing scientist at Anheuser-Busch InBev, our understanding of the extraction process has advanced that much more. Using some advanced dry hopping techniques, we can use this science at home to achieve hop bliss. But first, let’s go over essential oils and other hop components that can affect your beer.
Identifying the Players
Extracting hop oils and other aroma components from hop cones is the driving force behind dry hopping beers. The exact number of different hop oils found in the lupulin glands of hops has been found to be nearly 500 unique forms. Those hundreds of hop oils can be split into three major classification groups: Hydrocarbons, oxygenated hydrocarbons and sulfur containing compounds. The hydrocarbon group makes up well over half of the hop oils by weight in a hop cone, and most hop-heads might know them as terpenes. Hop oils like myrecene, pinene, and humulene are just three examples of terpenes (hydrocarbons) that many folks versed in this subject would recognize. But don’t let names fool you. For example, humulene has been shown to come in 17 distinguishable forms in a hop cone, each slightly different than the other (welcome to the wonderful world of organic chemistry).
Oxygenated hydrocarbons include the terpenoids. Terpenes and terpenoids have a very similar skeleton structure, but the terpenoids will include an oxygen group. Esters and alcohol groups fall into this category with familiar hop oils like linalool, geraniol and citronellol. This group will come into play later when discussing glycosides, so pay mind to this group. Finally there are the sulfur compounds such as thiols like 4mmP, a polarizing compound some beer drinkers liken to cat pee while others perceive as tropical fruit aromas. Many recent studies have shown that sulfur compounds may play a bigger role in the hop characteristics than thought previously, given the very low sensory threshold of many of these compounds. Even though they make up less than 1% of the hops oils, the ultimate weight they carry into the beer may be rather hefty.
Just outside of the hop oil world, but very relevant to this discussion, you’ll find the glycosides. Glycosides are in fact a combination of a terpenoid (see earlier) with a sugar molecule (glucose). Peter Wolfe took the time to slowly explain how glycosides can play a prominent role in the aroma of beer. Glycosides are tied together with a “relatively” unstable bond (an ester bond) between the glucose group and the terpenoid. In beer, this ester bond can hydrolyze (break apart) and release the terpenoid and the glucose to the solution. So if you can hydrolyze the glycoside, you increase the terpenoids in solution.
I emphasized the word relatively in quotes in the last paragraph for a reason: To highlight the term. This bond break won’t happen by itself; it needs a push. That can happen via two pathways. The first is a spontaneous reaction based on the pH of the solution. The lower the pH, the faster the spontaneous hydrolysis reaction can occur. This is convenient since beer pH is much lower than wort pH and this spontaneous reaction won’t occur until pH is down near 4.4. The pH of beer is generally 4–4.2. The lower the pH, the faster this hydrolysis reaction occurs. The second pathway has been shown to occur thanks to yeast.
Hydrocarbons are generally the most volatile of the hop oils while their oxygenated cousins are less so. Glycosides are not volatile at all. Many brewers will look to the hop oil’s flash point to gauge the volatility of the hop oil. The higher the flash point, generally the less volatile the hop oil. Hop oils can generally be diminished in your beer by three means. First is heat; the volatile oils can be vaporized more easily the warmer the solution. This most often occurs while the wort is still boiling or just after boil. Second is by scrubbing and most often occurs in the fermenter. Most brewers refer to the scrubbing process either when volatile oils are pushed out of the fermenter with any CO2 escape or when oils stick to yeast membrane and are effectively dragged out of solution as the yeast flocculate (settle). Finally, hop oils can degrade by age or by oxygen. This occurs most often in the racking or bottling process and subsequent aging of the beer.
Now to put these concepts into play. To help with the details I interviewed seven brewers: Vinnie Cilurzo, Owner/Brewmaster at Russian River Brewing Co. in Santa Rosa, California; Matt Brynildson, Brewmaster at Fire-stone Walker Brewing Co. in Paso Robles, California; Jamil Zainasheff, Owner/Brewer at Heretic Brewing Co. in Fairfield, California: Ashton Lewis, Master Brewer at Springfield Brewing Co. in Springfield, Missouri; Josh Pfriem, Owner/Brewmaster at Pfriem Family Brewers in Hood River, Oregon; John Kimmich, Owner/Head Brewer at The Alchemist in Waterbury, Vermont; and Jack Hendler, Co-Owner/Head Brewer at Jack’s Abby Brewing in Framingham, Massachusetts.
Know Thine Enemy – O2
Every brewer and scientist I talked to had the same piece of advice to homebrewers: Focus on minimizing oxygen uptake post-fermentation. So let’s talk about this one first since it is the first variable every brewer should worry about. John Kimmich has focused a lot of time and energy towards making sure that the dissolved oxygen (DO) of his beers is minimized. While it may not be the only reason his beer Heady Topper is ranked the #1 beer in the world by users on BeerAdvocate.com, it certainly helps. He recounted a story when a quality assurance person from his canning company came to test his beers one day. The tester needed to run back to his car since he thought his dissolved oxygen (DO) meter was broken. He had measured 1 part per billion (ppb) DO in The Alchemist’s brite tank (a vessel that is somewhat akin to a homebrewer’s bottling bucket). He had never seen numbers that low. While John’s process may seem like a bit of sorcery, one thing that I do know is that John is adamantly opposed to filtering his beers. The yeast left in solution can act as a buffer against any oxygen uptake. This is one reason you may not want to filter your beers when brewing a hop-forward beer.
So how and when is oxygen going to be introduced into your beer after fermentation finishes? There are two principle ways so long as you are using proper brewing equipment and not aging for long periods of time. The first potential culprit for O2 ingression is from racking. To help you solve the racking dilemma, homebrewers have four options: A bronze, silver, gold, and platinum option. The bronze option is for homebrewers who don’t have CO2 on hand. Rack as gently as possible and if possible, rack before the yeast has finished primary fermentation. This will allow a new blanket of CO2 to develop after racking. The silver option is for brewers with access to CO2 who can purge their receiving vessel with a shot of CO2. One physical trait of CO2 to keep is mind is that it is slightly heavier than air (N2 and O2) so it will settle on the bottom and help create a blanket as long as there isn’t too much agitation. So you may not need to purge all oxygen, just enough to create a healthy blanket. Ashton Lewis isn’t as convinced, saying that, “Small differences in temperature create convective currents that mix gases. It may be true that there may be a greater concentration of carbon dioxide at the bottom of the vessel, but there is still more than enough oxygen in most cases of simple blanketing to oxidize beer.” So finally we get to the gold and platinum options, which keeps the system closed and basically impossible for oxygen to get introduced to the beer (see the sidebar on page 93 for details on closed system racking).
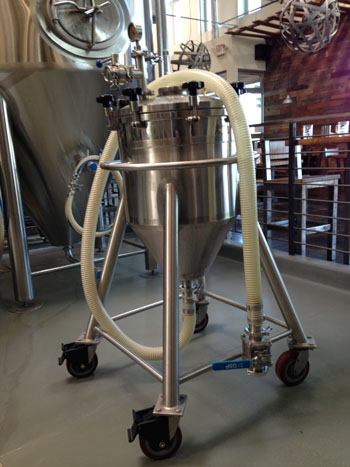
The second potential culprit is from any post-fermentation additions such as dry hops or coffee or cocoa nibs or anything else that brewers may add to their beer. Pro brewers have created some highly inventive devices to deliver their dry hops to their fermenters in an oxygen free system. You may have heard of a hop cannon or Sierra Nevada’s hop torpedo, which are two such devices. Hop cannons will shoot the pellets into the fermenter via CO2 (see photo, page 88). The hop torpedo is an inline recirculation system that passes the finished beer through the dry hops before returning the beer back to the fermenter. Peter Wolfe and Thomas Shellhammer both agreed that these devices were overkill on the homebrew scale. Homebrewers can get away with eliminating most oxygen from the dry hop process for less. Thomas Shellhammer’s advice, especially with whole cone hops is, “. . .to ensure the hops are free of residual oxygen before adding to the beer. Do this by vacuum packing them first; better yet, vacuum pack then gas flush them with nitrogen or carbon dioxide. Another approach is to submerge the hops in cold sterile water, then transfer the whole lot to the beer.” Ashton Lewis adds that working with de-aerated water is a huge benefit if you can get it. Boiling the water will help de-aerate but won’t remove all residual O2. Peter Wolfe’s suggested approach is slightly different. “I like to rack my beer onto the dry hops when there are still a few gravity points left to go until terminal gravity is reached,” he said. The active yeast will help absorb some of the oxygen uptake that has occurred during transfer. And finally for those homebrewers who try to emulate the recirculation methods utilized by pro-brewers, Vinnie Cilurzo adds that you have to make sure you are not introducing any oxygen into the system. If you can have your beer read 1 ppb DO after racking and adding dry hops, you’ve mastered this enemy.
Choosing Your Weapon
The age old discussion is, “Which is better for dry hopping in your hop forward beers, pellets or whole hops?” No matter which you choose, the most important aspect is that you are choosing aromatic hops that are pleasing to your olfactory senses. To put it simply, “The hops need to smell awesome in order to make awesome beer,” says Matt Brynildson. Vinnie Cilurzo’s advice is to, “Watch out for hops that have onion/garlic character. You will never be able to get rid of this from the hop.” Some brewers prefer whole hops and some prefer pellets. That said, tests run by Peter Wolfe and Thomas Shellhammer point to pellets holding a slight edge over the unprocessed form. What they found is that pellets actually contain less essential oils than whole cone hops most likely due to the pelletizing process. But oils from pellets are more easily extracted into beer during dry hopping leading to slightly more aroma than whole cone hops. Also the oils in pellets were extracted faster than whole cones. Pellets have better storage life and are easy to work with for dry hopping since they submerse themselves, break apart, and fall to the bottom so you can easily rack your beer off of them. A downside can be that some pellet producers have been known to expose the hops to high temperatures during the pelletizing process, destroying the hop’s precious oils. Most pelletizers for the craft beer world have learned of this potential pitfall and have made adjustments to the process in order to keep pelletizing temperatures as low as possible.
If you are going to be using whole cone hops, you need to deal with two potential factors that could hurt the beer. First is to make sure that if O2 is found in the cones, that you flush them with CO2, nitrogen (N2), or sterile water before adding the beer (see Thomas Shellhammer’s earlier advice). Racking the beer on top of the flushed hops is then the preferred method once you have them flushed. The second factor is that whole cones float and you need a way to submerse them without adding oxygen. A sanitized bag that is weighted down with sanitized stainless washers or marbles can be used to make sure that the hops remain submerged. Whole cone hops could also be added before primary fermentation is finished and then gently pushed down with a sanitized paddle to completely submerse them.
Despite what research shows, it is all about what works best for your system. Some homebrewers prefer to work with whole hops while others prefer to work with pellets. Both can produce award-winning beers.
Timing is Everything
For a few years I have always tried to eliminate as much yeast as possible from suspension before adding my dry hops. That concept was introduced to me from a sound bite given by Vinnie Cilurzo. The reason was simple as stated earlier in this article: Yeast can strip hop oils from solution. So I would either rack my beer to secondary before adding dry hops or added dry hops only after adding a fining agent like Polyclar or Biofine. I have always been happy with the results, but when I started polling homebrewers a little while ago, there was a lot of attention paid to adding dry hops while yeast was still active. The term biotransformation of hop oils kept coming up.
In my discussions with pro brewers, two of the seven brewers add their dry hops while yeast was still active. On the one side of the coin, Josh Pfriem states that, “. . .the constant nucleation from fermentation scrubs away some of the hop aromas that you are trying to achieve.” Matt Brynildson, on the other hand, adds his hops during fermentation, and the hardware garnered for his hop-forward beers should make any brewer re-think their approach. Matt has three reasons for his method: “This is to take advantage of the active yeast for (1) dissolved oxygen protection (2) natural mixing which we believe helps in better extraction of wanted oils and (3) biotransformation of hop oil compounds.” But he also warns of the potential pitfall of adding dry hops to an active fermentation. “The dreaded ‘beer volcano’ can happen easily resulting in beer loss . . .”
So what are biotransformations anyway? Once again I turned to Peter Wolfe to help dissect this term. He explained that when we talk about biotransformations on hop compounds we are talking about oil components that yeast have modified. An important aspect is that we are talking mainly about terpenoids and glycosides. Terpenes are rarely affected by biotransformations. Biotransformations of hop compounds in beer can occur in two forms. The first is fairly straightforward when one compound is transformed into another. An example of this would be the transformation of geraniol to ß-citronellol. The second biotransformation is the hydrolysis of the glycosides which was introduced earlier. Certain yeast strains have shown the ability to transform non-aromatic glycosides into aromatic terpenoids. Shellhammer and Wolfe found that certain aromatic terpenoids increased their concentration over time in the presence of yeast. This may be just one reason many people find bottle conditioned or unfiltered beer to be superior to filtered beer.
Create the Perfect Environment
So for how long, at what temperature and how much to dry hop your beer? Before I started research into this article, my idea to get ideal hop oil extraction was to dry hop for 10 days at 65 °F (18 °C). It had always treated me well. I received a lot of hop aroma when appropriate levels of hops were added. But in a polling of homebrewers, I realized that my 10-day duration was on the high end of the scale. Many homebrewers were going as short as three days. Of all the brewers I talked to, only Vinnie Cilurzo went more than five days with his dry hops. Research by Wolfe and Shellhammer confirm that hop extraction occurs rapidly. In fact in a recirculating system they found that most aroma compounds are extracted from pellet hops in a matter of hours. For pelletized dry hops added without recirculation, they found that full extraction occurred in one to two days while whole hops took closer to a week for full extraction.
The next variable to look at is temperature. Considering the rise of the IPL (India Pale Lager), the temperature of the beer and its effect on the oil extraction is something to keep in mind. So my first turn in this department was to Jack’s Abby Brewing Brewmaster Jack Hendler whose lagers have made waves in the US craft beer scene. Surprising to me, the average time Jack dry hops is only three to four days. He does increase his temperature to 55 °F (13 °C) for adding hops, but adds that, “The cooler the temp, the less aroma you’ll pull from the hops.” If you do plan to try an IPL of your own, Jack has some further dry hopping suggestions. “You’ll need to reevaluate dry hop addition quantities, because the dry hop aroma will be highlighted more than an ale. You may find a different or smaller quantity gets the aroma you’re looking for,” he said.
So how much dry hops should you add? Obviously that is completely dependent on what you are trying to achieve with your beer. But keep in mind that sometimes, more isn’t always better. In my freshman year microeconomics course I learned about a basic principle, the law of diminishing returns. In the terms of dry hopping, the more you add, the less net gain you add with each additional increment. In fact you may find that you are detracting from a certain nuanced characteristic of the beer if you overwhelm it with another characteristic. Finding the right balance of hop oils of a varietal or a blend is key. If you’ve had Heady Topper before, you may be surprised to learn that John Kimmich dry hops with under 4 oz. (113 g) per 5 gallons (19 L).
Is Layering the Key?
Only two of the seven pro brewers I spoke to didn’t add their dry hops in stages. One that was surprising was John Kimmich who adds all his dry hops in one big charge for his Imperial IPA. Jamil Zainasheff pointed out an important nuance to me: “The main reason is that we’re dry hopping into cylindroconical fermenters. The bottom is a narrow cone, which means that when the hops drop to the bottom, it results in a smaller surface area.” He said not to worry about layering in dry hops on a small scale. Peter Wolfe also weighed in on the topic saying especially if a homebrewer is using a flat bottomed fermenter, there is little reason to layer in your hops, the surface area to volume ratio is much greater on a homebrew scale.
There is one reason that homebrewers may want to layer in their dry hops. As stated earlier, Matt Brynildson adds dry hops while active fermentation is still ongoing. For some of his beers, he will add a first dry hop charge near the termination of active fermentation and a second addition after flocculation has occurred. He backs up his approach with the concept to, “Take advantage of both conditions (1) with yeast and (2) without yeast influence.” So if you plan to add your first dry hop charge near the end of active fermentation, you may also want to take advantage of this two layered dry hop approach. Otherwise, if you are planning on waiting until most yeast has settled from the beer, then one stage dry hops are all you need.
Recipe
The Hammer Rye IPL
(5 gallons/19 L, all-grain)OG = 1.071 FG = 1.014 IBU = 66 SRM = 6 ABV = 8.3%
Inspired by Jack’s Abby Brewing RIPL Effect, this was my attempt to brew something akin with a rye edge coming out from behind the bold hop profile. Jack’s Abby used triticale, but I used a rye malt in my brew, and also used the hops I had on hand.
Ingredients
10 lbs. (4.54 kg) continental Pilsner malt
5 lbs. (2.27 kg) rye malt
8 oz. (0.23 kg) crystal malt (10 °L)
6 oz. (170 g) rice hulls
4.4 AAU Apollo hops (first wort hops) (0.25 oz./7 g at 18% alpha acids)
9 AAU Apollo hops (15 min.) (0.5 oz./14 g at 18% alpha acids)
9.6 AAU Columbus hops (0 min.) (0.75 oz./21 g at 13% alpha acids)
9.2 AAU Chinook hops (0 min.) (0.75 oz./21 g at 12.2% alpha acids)
4.8 AAU Cascade hops (0 min.) (0.75 oz./21 g at 6.4% alpha acids)
7.1 AAU Amarillo® hops (0 min.) (0.75 oz./21 g at 9.5% alpha acids)
1.5 oz. (43 g) Amarillo® hops (dry hop)
0.75 oz. (21 g) Chinook hops (dry hop)
0.75 oz. (21 g) Cascade hops (dry hop)
Wyeast 2007 (Pilsen Lager) or White Labs WLP840 (American Lager) yeast as a (~4 qt./4 L) starter
1 tsp. gypsum (optional if using low mineral water)
2⁄3 cup corn sugar (if priming)
Step by Step
This is a single infusion mash. Heat 5.6 gallons (21.2 L) of strike water to 168 °F (76 °C) to stabilize the mash temperature at 152 °F (67 °C). Rest at this temperature for 45 minutes then begin lautering. Once you begin your run-off into your kettle add the first wort hops to the kettle. Collect 6.5 gallons (25 L) of wort, add the optional gypsum (see ingredients list) and boil for 75 minutes adding the second addition of hops with 15 minutes left in the boil.
After the boil is complete, begin a 20-minute whirlpool phase, keeping the wort hot. Rapidly chill wort to 52 °F (11 °C), pitch an appropriate yeast starter (~4 qt./
4 L) and aerate the wort thoroughly. Ferment at 52 °F (11 °C). After primary fermentation is complete (1–2 weeks), drop the temperature of the beer down to 45 °F (7 °C) and condition for one to three weeks. After conditioning, gently rack the beer into a CO2 flushed secondary vessel with flushed hops already in the vessel. Raise the temperature to 55–60 °F (13–16 °C) and wait three to seven days on the dry hops. Bottle the beer with priming sugar or rack the beer to a keg and force carbonate. Carbonate the beer to 2.4 volumes CO2.
The Hammer Rye IPL
(5 gallons/19 L, extract only)OG = 1.071 FG = 1.014 IBU = 66 SRM = 8 ABV = 8.3%
Ingredients
10 lbs. (4.54 kg) rye liquid malt extract
4.4 AAU Apollo hops (first wort hops) (0.25 oz./7 g at 18% alpha acids)
9 AAU Apollo hops (15 min.) (0.5 oz./14 g at 18% alpha acids)
9.6 AAU Columbus hops (0 min.) (0.75 oz./21 g at 13% alpha acids)
9.2 AAU Chinook hops (0 min.) (0.75 oz./21 g at 12.2% alpha acids)
4.8 AAU Cascade hops (0 min.) (0.75 oz./21 g at 6.4% alpha acids)
7.1 AAU Amarillo® hops (0 min.) (0.75 oz./21 g at 9.5% alpha acids)
1.5 oz. (43 g) Amarillo® hops (dry hop)
0.75 oz. (21 g) Chinook hops (dry hop)
0.75 oz. (21 g) Cascade hops (dry hop)
Wyeast 2007 (Pilsen Lager) or White Labs WLP840 (American Lager) yeast
1 tsp. gypsum (optional if using low mineral water)
2⁄3 cup corn sugar (if priming)
Step by Step
I’ve used the Briess rye liquid malt extract which is made up of about 20% rye malt and 10% caramel malt (40 °L). This will give the beer a slightly less rye edge and a slightly more caramel flavor than the all-grain version. That said, it will still produce an amazing beer.
Add 5.5 gallons (21 L) of water plus malt extract to your kettle. When the temperature of the kettle reaches about
180 °F (82 °C), add the first wort hops to the kettle. Collect 6.5 gallons (25 L) of wort, add the optional gypsum (see ingredients list) and boil for 75 minutes adding the second addition of hops with 15 minutes left in the boil.
After the boil is complete, begin a 20-minute whirlpool phase, keeping the wort hot. Rapidly chill wort to 52 °F (11 °C), pitch an appropriate yeast starter (~4 qt./
4 L) and aerate the wort thoroughly. Ferment at 52 °F (11 °C). After primary fermentation is complete (1–2 weeks), drop the temperature of the beer down to 45 °F (7 °C) and condition for one to three weeks. After conditioning, gently rack the beer into a CO2 flushed secondary vessel with flushed hops already in the vessel. Raise the temperature to 55–60 °F (13–16 °C) and wait three to seven days on the dry hops. Bottle the beer with priming sugar or rack the beer to a keg and force carbonate. Carbonate the beer to 2.4 volumes CO2.