Homebrewers love hops—it’s no secret. You will always remember the first time you smelled those powerful pellets drop into the kettle. The little bitter cones give beer life, personality and uncanny edginess. Without them, beer would often times be unbalanced, overly sweet and uninteresting.
Hops are so important, some people devote their entire lives to the plant—hop fascination transformed into obsession.
The “hop heads” out there, like Tom Lewis from Cheshire, England, are always looking for ways to push the hoppy envelope in their homebrews. A hopback is the perfect way to infuse fresh-hop character in beer just before it hits your glass. Check out Tom’s easy-to-build hopback project below!
At one of our local homebrew meetings, a few homebrewers and I were discussing ways we cram as many hops as possible into our IPAs (the beer style that dominated that particular meeting). One of our local brewers from the Cheshire Brew House was explaining future upgrades to our systems and how he wanted to build a custom hopback because his Blichmann HopRocket™ was too small.
After our meeting, my creative juices started to turn, and wondered how I could make my own hopback. Could I make something that worked efficiently? I needed it to be cheap and easy to clean. After scouring and searching the web, I found a few different ideas, many of which weren’t practical or easy for me to make. One popular idea was the Kilner jar hopback, however this was too small and I didn’t like the idea of glass and heat. It’s not worth the potential danger that combination imposes.
Suddenly, I came across a stainless steel hopback using a kitchen storage jar. It was a pot with two holes in it, one on the top and one on the side close to the bottom. The top hole was used for the hot wort. The bottom hole was used as an outflow and had a stainless hop filter (similar to a mashtun false bottom) to filter out hop debris. I thought the idea was brilliant, but wanted to simplify the design.
I decided to move the outflow valve to the base of the pot, which allowed for more delicious wort to flow through. I also swapped out the hop filter style for a simple stainless sink filter (an idea I saw while researching homemade hopbacks).
The construction of the hopback was fairly simple. I visited my local TK Maxx (the equivalent of TJ Maxx in the U.S.) to look for a stainless steel pot. I found one in the reduced kitchen section. It held about 1 L, a great size to fit a lot of hops.
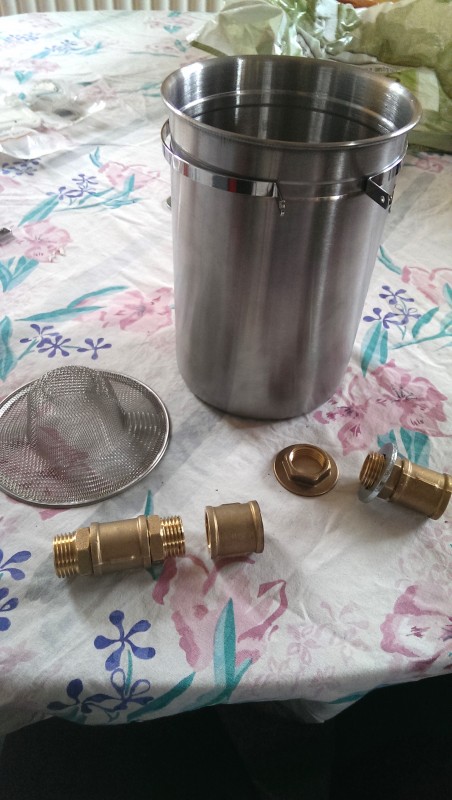
The hardest part after purchasing the pot was finding someone to neatly and safely drill 1/2″ holes. I used weldless brass fittings from my local department store and a sink filter from the same shop.
Once I had all my materials, the build was simple. Tightly screw in everything and then test the fittings and connection to your brew system.
- (1) stainless steel pot (big enough to fit as many hops as you want)
- (1) ¾” hole punch
- (3) ¾ male to male nipples (brass or stainless steel)
- (3) ¾” female to female fittings (brass or stainless steel)*
- (1) ¾” flanged black nut (brass or stainless steel)
- (1) stainless steel sink strainer
- washers for both holes
- PTFE tape (plumber’s tape)
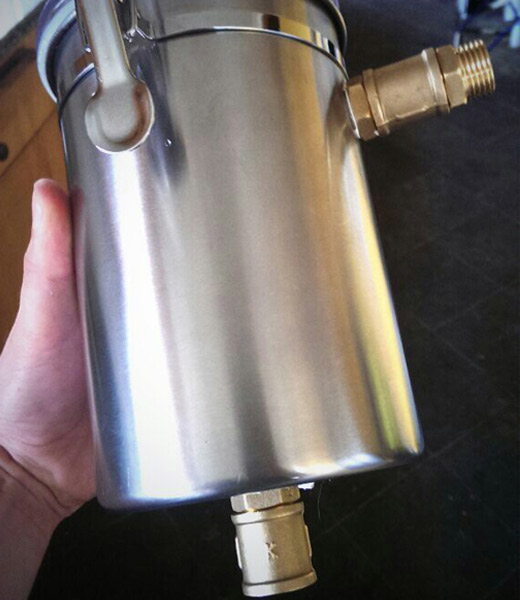
- Punch/drill one (1) hole in the side of the stainless steel container. Make sure it’s far enough from the lid so the lid still closes.
- Punch/drill second hole in the bottom of the pot. Be careful not to bend the bottom.
- File and sand all holes.
- Screw male fittings into female fittings, add a washer to one end and post it through the hole in the side of the container.
- Add another washer to the ale fitting that is now on the inside of the pot, before screwing on a female fitting.
- Screw the last fittings together, apply a washer and post the male end into the bottom hole. Screw the flanged black nut on.
- Check for leaks, apply PTFE tape to male fittings if needed.
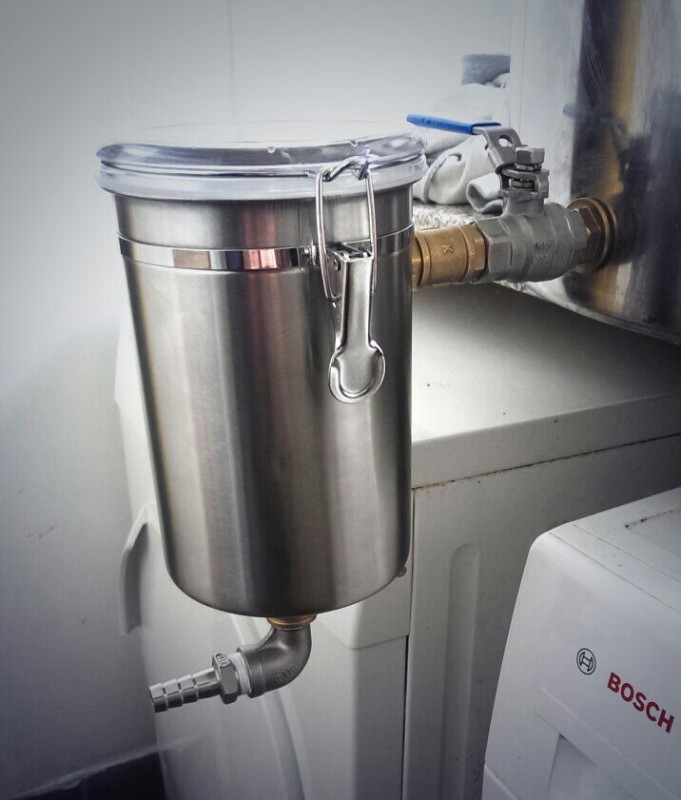
The hopback works wonderfully as an inline filter, as well as an actual hopback. I usually attach it mid-brew, but clean it with sanitizer (just to be on the safe side) beforehand, and then cram as many hops as I can inside.
I use the main outlet valve to control the flow. However, adding a second ball valve on the outfitting would offer much better flow control. Once the beer comes out of my hopback, it goes through my CFC (counter-flow chiller) and into my bucket, sometimes via a pump.
This device adds a crazy amount of aroma to my beer. My first beer through the device was a Citra Pale Ale. I still remember my whole fermenting chamber smelling of tropical juice. The only downside is it uses up a lot of hops, with mine fitting between 70-100 grams. If you’re a hop head, I definitely recommend using this hopback. It changes everything.
- Screw hopback onto the ball valve.
- Put your sink strainer into the bottom of the pot.
- Fill with hops.
- Attach hose via a hose-barb
- Let it flow!
- You can use two (2), but make sure it clears the tap of your boiler
- Might have to tweak the flow of your runoff to make sure the hopback doesn’t overflow.


