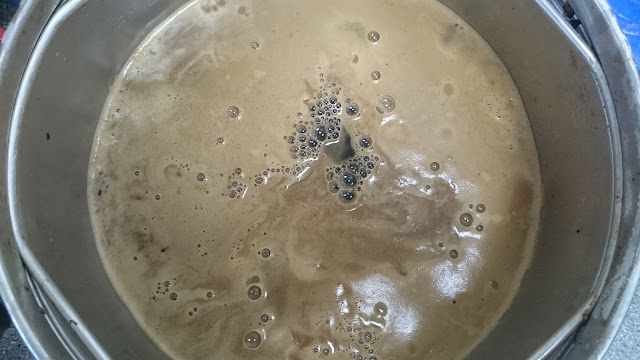
Many homebrewers who are new to all grain brewing ask us if it’s possible to reduce the time spent on their brew day by cutting down the amount of time they spend boiling their wort, Often their thinking is along the lines of ‘if the purpose of boiling the wort is simply to sterilise it, can I not reduce the brew day by boiling the wort for just long enough to make it sterile?’
Whilst it may be possible to reduce the boil slightly (ie. less than 60 minutes) it’s important to note that boiling the wort has many more significant functions when it comes to brewing beer than simply being about sterilising (though this is an important function).
We caught up with Dave in the UK office to talk us through some of the other functions of wort boiling.
“Wort boiling is an extremely important stage in the brewing process and is important for so many more reasons than a lot of brewers give it credit for such as;
Stopping Enzyme Activity
It’s largely dependent on the enzyme as to what exact temperature this occurs but within a range of 50-75°C most enzymes become denatured (hence the reason for a ‘mash out’ step when mashing) and once the wort reaches boiling point there is typically no enzyme activity occurring. This is important as enzymes will alter the fermentability of the wort and therefore alter your finished beer. We would typically recommend you add a mash out step to your mash schedule, simply by raising the beer to 75 °C at the end of the mash and holding it at that temperature for 10 minutes.
Concentrating the Wort
As wort boils, the water content is driven off (visible as steam). The more water content is driven off, the more concentrated your wort becomes and so, up to a point, the higher your original gravity (OG). This is why knowing your rate of evaporation is important when it comes to calculating your OG (for those wondering, it should be around 2.5 L per hour on the Grainfather).
The calculation is;
pre boil volume x pre boil gravity = post boil volume x post boil gravity
and to work out your post boil volume you take your evaporation rate from your pre boil volume – eg 28 L – 2.5 = 25.5 L after a 1 hour boil.
So now you can put 25.5 into the equation. For this example we have a 1.050 pre boil gravity and 28 L pre boil volume
28 x 50 = 25.5 X post boil gravity
(28 x 50) / 25.5 = post boil gravity
1400 / 25.5 = post boil gravity
54.9 = post boil gravity
so your post boil gravity is going to be ~1.055 meaning if you calculate this early enough you can make adjustments such as adding more water or boiling for longer.
Isomerising Alpha Acids
Alpha acids, which are what brewers take into account when calculating the bitterness for their beers, are actually insoluble in wort. It is only by boiling that they are converted to iso-alpha acid which is much more soluble. Research shows that isomerisation of iso-alpha acids occurs quickly at boiling temperatures, with somewhere above 90% of the wort bitterness imparted within the first 30 minutes of the boil. This means if you did want to cut your boil short and were purely concerned with getting your bitterness correct then you could assume a 10% loss in utilisation and just do a 30 minute boil (though obviously your post boil gravity will be lower). Maximum isomerisation should occur within 60-70 minutes of boiling, which is why in a 90 minute boil you typically wouldn’t add your bittering hops until there were 60 minutes remaining – you’re not getting any extra utilisation by leaving them in longer.
Increasing Colour
When you boil your wort there are three reactions that take place that each contribute to the increase in colour that your wort will undergo. The first is the Maillard reaction, a chemical reaction between carbonyl and amino acids which is also responsible for food browning. The caramelisation of sugars is also occurring and contributing to colour change and lastly some oxidation of polyphenols is occuring.
Reduction of Wort pH
As you boil your wort calcium compounds react to form insoluble compounds meaning by the end of the boil, at least half the calcium that was present in the wort has been separated from the liquid and this is largely responsible for the decrease in wort pH during the boil. If you’re wondering what pH levels your beer should be at during various stages, you should aim for a pH of 5.2 – 5.5 in the mash to assist with enzyme activity, your pre boil pH should ideally be around 5.2 – 5.4 as lower will have a negative effect on your hop utilisation and higher will increase perceived bitterness. Boiling the wort will drop your pH by 0.1 – 0.2 giving you a fermenter pH somewhere around 5.0 – 5.3 and then fermentation will lower the pH even further. Your final beer should be somewhere in the range of 4.2 – 4.6.
It’s important to achieve the required pH drop in the boil as it helps with things like, improving your clarity, improving beer flavour, encouraging yeast growth and inhibiting the growth of bacteria.
Driving Off Volatile Compounds
As you boil your wort you drive off unwanted volatile compounds such as DMS (dimethyl sulphide) with the steam. DMS is largely undesirable in beer as it imparts a ‘sweetcorn’ taste. By controlling the duration and strength of the boil it is possible to control the level of DMS.’
These are just some of the reasons why wort boiling is a vital part of the brewing process and why we feel it deserves more attention than it usually gets! Have you experimented with reducing or increasing your boil times? What were the results?