Obi110 was on end of support with no firmware upgrades. On November 1 2017 Google Voice changed certificates and Obi110 failed with ” Backing off” Connection error.
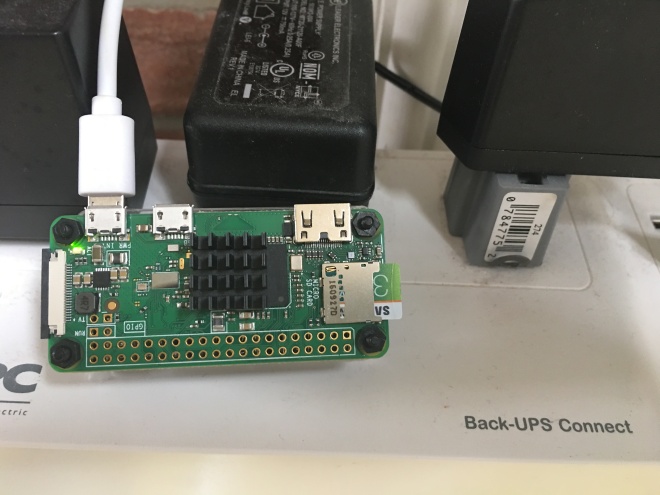
Initially thought as DNS Server issue and tried all and when support refused any firmware updates for Obi110 to fix the certificate issue, I noticed a SIP alternative using a third party provider for incoming calls in the obhi forums. It is an although a puny $6 one time charge, not sure how long this will last, I decided to find an open source solution for running own SIP Pbx. Googling resulted in Asterisk PBX solution and I had a spare raspberry pi w ( bought @Mircocenter for $5) that I could use.
Here are the steps to prepare raspberry PI:
- Download the raspbx from http://download.raspberry-asterisk.org/raspbx-10-10-2017.zip.
- Use a software like etcher to image it to an SD CARD (Steps: https://www.raspberrypi.org/magpi/pi-sd-etcher/)
- Add WIFI connection settings configuration file wpa-supplicant file.
-
sudo nano /etc/wpa_supplicant/wpa_supplicant.conf - Go to the bottom of the file and add the following:
network={
				ssid="your ssid"
				psk="wifi password"
			}
-
- Now reboot and log in using root and raspberry as a password. Change password for security and then run raspbx-upgrade.
- Added a static route in the router to use a fixed local ip.
- connect to the system using ” ssh root@IPAddress” , where IPAddress is the static IP of the raspbx box.
- Change timezone ( configure-timezone command ) and also keyboard and localization settings using raspi-config command)
Here are the steps to the configuration of the raspbx pbx:
( more info here http://www.raspberry-asterisk.org/documentation/#basicconf)
- go to http://ipaddress to config the asterisk using FreePBX Gui.
- First, it will ask you to enter a password for admin and an admin user will be created.
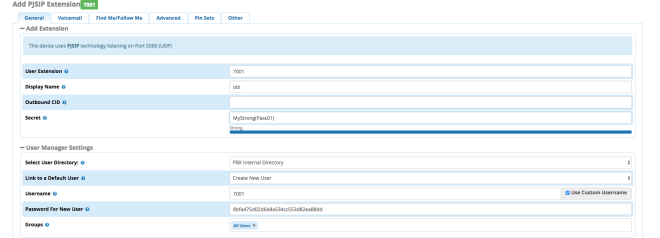
- Using Menu -> Applications–> Extensions create a new PJSIP Extension. (Don’t forget to Submit and Apply config to save )
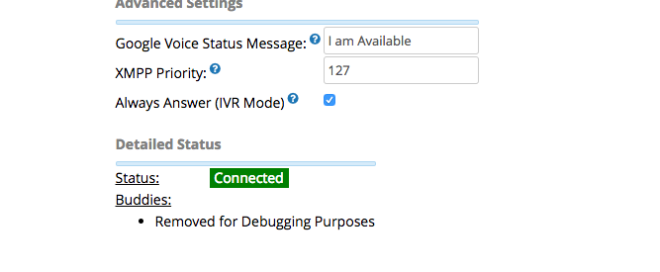
- Using Connectivity-> Google Voice (Motif) configure Gmail Voice. In Gmail security, you can create a new app password and then use this app password here. Also, make sure Add Trunk checkbox and add outbound routes is enabled.

- Once you submit and apply. you should see a connected status as below.
- Open the outbound route created and remove the defaulted route password. Also, move this over the default Star Communication outbound route.
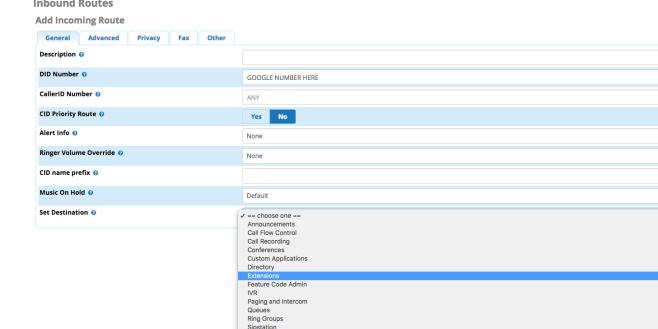
- Add a new Inbound route using Connectivity–>Inbound routes ( in the DID Number add the GOOGLE Voice number without any formatting like 2222332323. Also, add set destination by selecting an extension that we created before.)
Test using Iphone or Android phone( Optional)
Download Zoiper SIP Softphone and add the extension and call any phone to see if the PBX is using the google voice account.
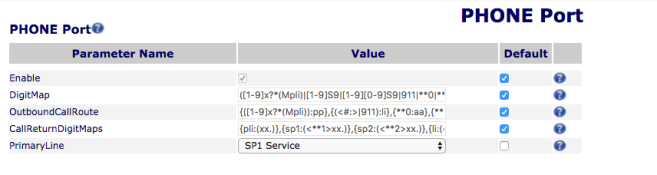
Here are the steps to configure Obi110:
- use instructions from https://wiki.freepbx.org/pages/viewpage.action?pageId=4161592.
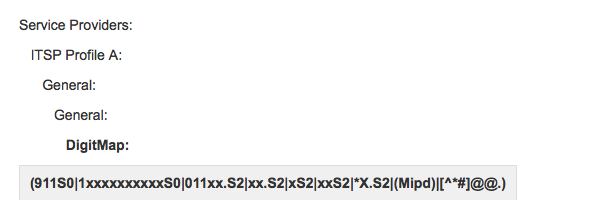
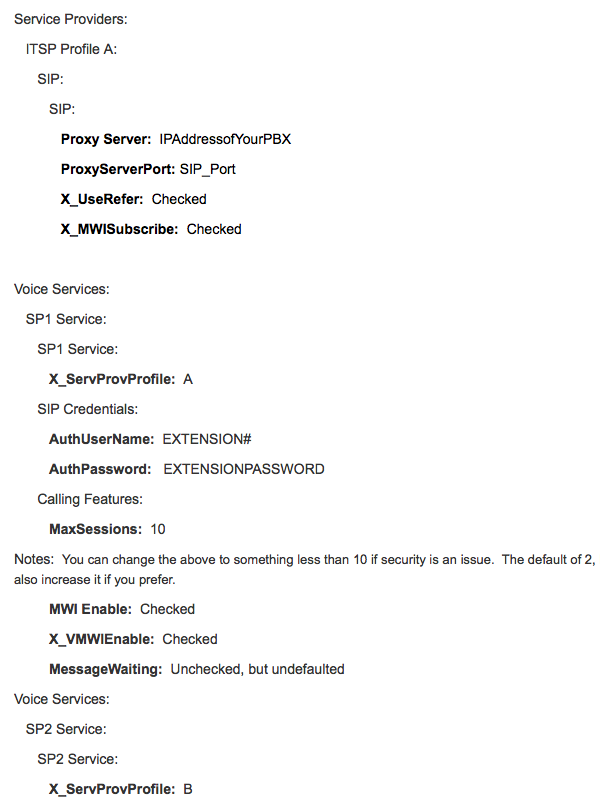
- in the obi config ip, change the Phone port Primary Line in the physical interfaces to use SP1 Service.
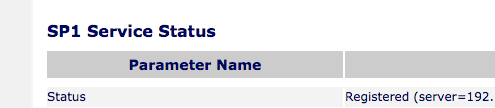
- Reboot the Obi110 and check SP1 Status. It should show
Now you should all set to receive and place calls using your phones.
source & comments: narahari