
Mash baking in my kitchen oven |
I visited Vikonys in Lithuania and saw how the Lithuanians there brew keptinis. The basic idea is straightforward enough: do a normal mash, then bake the mash in a huge Lithuanian duonkepis oven to get caramel flavours by toasting the sugars in the mash. This is an important idea, because it’s a completely “new” type of brewing process that creates flavours you cannot make with normal techniques.
My problem was that although I’d seen it done, I didn’t know what temperature to bake the mash at, because I didn’t dare stick my thermometer into that very hot oven. It was no use asking the brewers, because they determine the temperature by the amount of wood they burn in the oven. So how to put together a recipe that other people could use? I decided the only way to do it was to brew keptinis myself at home at different temperatures to find out what worked and didn’t work.
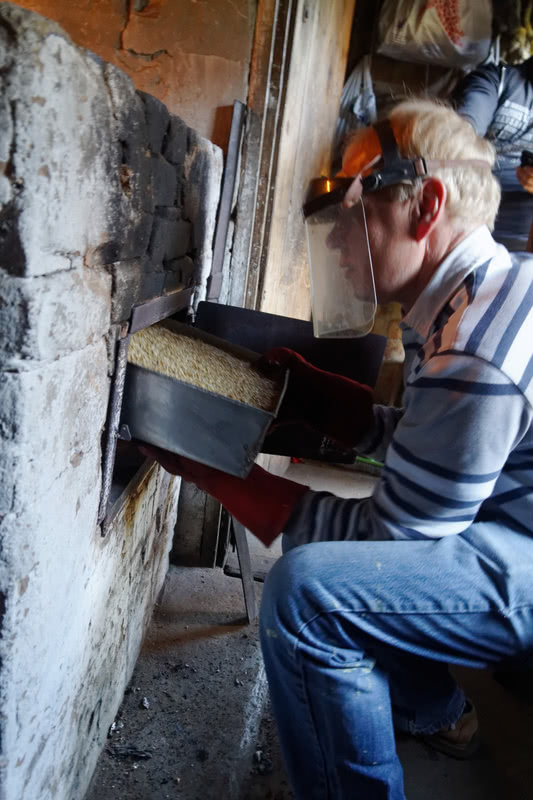
Vytautas Jančys putting the mash into an oven so hot he’s wearing huge gloves and a plexiglass visor. |
My goal was to recreate that huge, massive earthy and caramelly flavour I remembered from the keptinis I’d tasted in Vikonys.
I guess I must be the only non-Lithuanian whose first solo brew was a keptinis.
Plan
I did a little reading on caramelization and found that it’s actually chemically very complex, to the point that it’s not yet fully understood. By looking at the most common sugar types in wort and their caramelization temperatures I found I could get a tiny amount of caramelization at 110C (230F), but for most of it I’d have to get to 160-180C (320-356F).
I also learned that at too high temperatures all that lovely caramel is burnt into sooty black stuff, so I wanted to avoid that.
Simonas’s estimate of the temperature of the duonkepis oven at 300C (572F) seemed reasonable to me, but since the temperature clearly fell during the baking it seemed reasonable to keep my electric oven a little lower. I decided to try 250C (482F).
First attempt
The starting point was figuring out the batch size, because the limiting factor was our kitchen oven. Or, to be precise, our oven pans. So I took out my wife’s various oven pans and computed the total volume. 9 liters. Okay, so that would be my total mash volume. I thought malts and water would fill equal amounts, meaning I could have 4.5 liters of malts and 4.5 liters of water. So I weighed 4.5 liters of malts and found that was 2.2 kilos (4.85 lb). From that, I could work out that to follow the Lithuanian recipe my batch size would be 5.6 liters with 33 grams (1.16 oz) of hops.
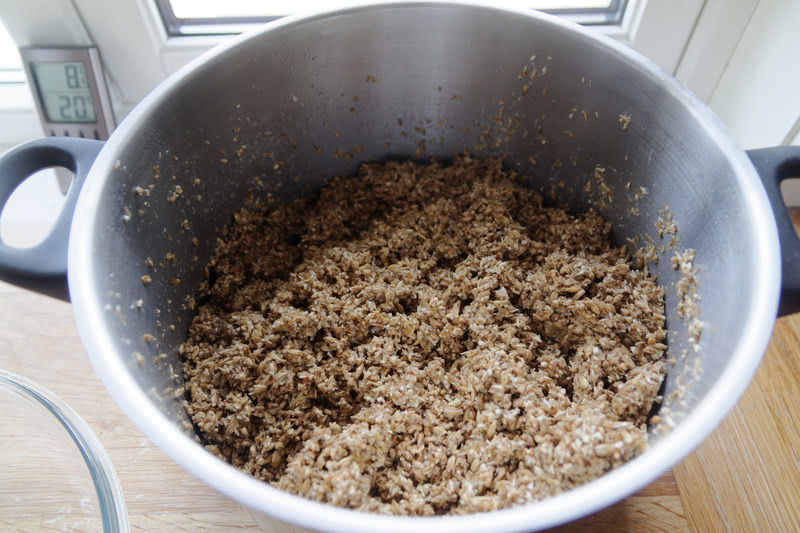
The mash. |
I heated water, put the malts in a kettle and added water until I had the mash at 65C (149F). Quite soon I realized having this in a kettle was dumb, because the temperature kept dropping. So I had to add more hot water periodically.
While the mashing was going on I heated the kitchen oven to 250C (482F), and once I had mashed for an hour I scooped the mash over into the oven pans. And now I found to my surprise that 4.5 liters of malts plus the 3.2 liters of water I had added in total filled … 4.5 liters. So I could have doubled the batch size and still had room for
everything. Ah well. Small batch size for the first try was probably a good idea anyway.
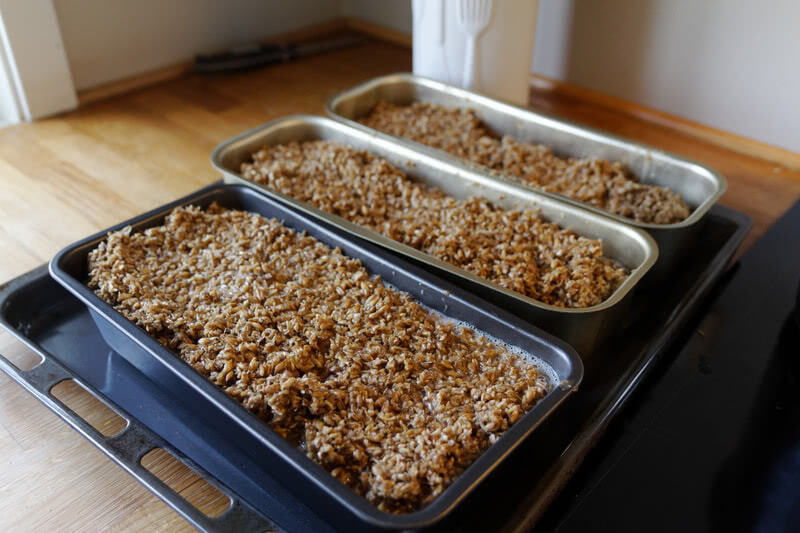
The mash ready in oven pans. |
Then the boxes went into the oven and I settled down to watch the show.
After 10 minutes the water in the boxes started boiling, so clearly the boxes had reached 100C (212F) already. I decided 250C (482F) for three hours might be a bit over the top and reduced the temperature to 180C (356F).
25 minutes. The visible water was mostly gone, but bubbles kept popping up, so there was still boil going on.
At 45 minutes it was still boiling, and the tops started going brown. A caramelly smell was coming out of the oven, so clearly I was on the right track.
65 minutes: the top was drying out and getting browner, but still boiling. Some smoke was beginning to appear.
The first box dried out at 2 hours, with the other two still boiling. Colour had kept darkening the whole time.
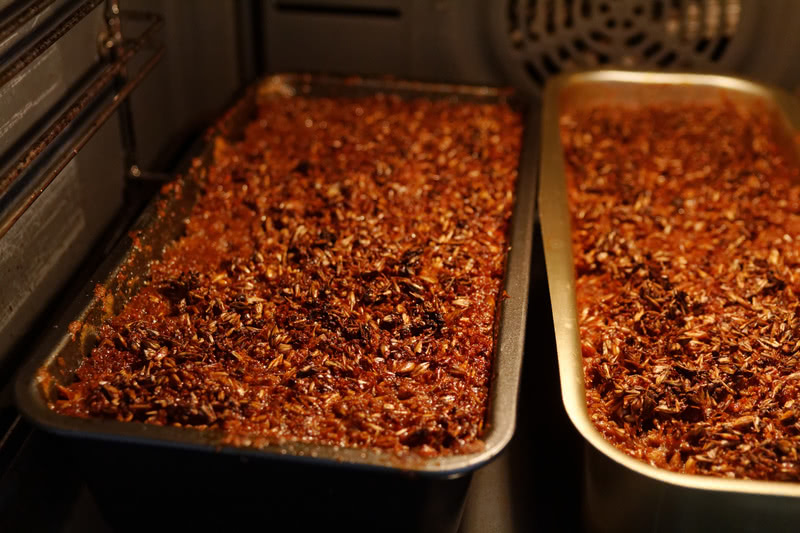
Getting pretty dark and fairly dry. |
At 2.5 hours only one box was still boiling and now they were
really getting dark.
After 3 hours the last one was still boiling when I took them out. I used my thermometer to check the center temperature and was astonished to get readings of 95-98C (203-208.4F) for all of them. 3 hours at 180C
and they still haven’t gone above 100C (212F)?!? What the …
The mash after baking. |
Poking at the mash I found there was a hard crust on top, with soft gooey caramelly stuff right underneath (promising!). The dark layer was very thin and underneath the mass of the mash was roughly as pale as when I started.
Soft, gooey, caramelly stuff. |
Anyway, I had work to do. I used a large wooden fork to break the crust on the boxes and dump the contents into the lauter tun. Then I added hop tea and hot water. Finally I ran off about 4 liters of wort. The idea was to get 5.6 liters, but my lauter tun is quite big, so I ended up losing 1-2 liters at the bottom that I couldn’t get out. An unexpected downside of the small batch size.
The wort was at OG 1.072, and I pitched a dry flake of #20 Espe that I had taken from my freezer that morning. The wort was around 30C (86F). I pitched at 19:00, but by the time I went to bed, there was still no activity, although foam started appearing during the night. It took roughly 24 hours for fermentation to really take off, so probably the viability of the yeast I’d taken out was not the best.
24 hours after that the beer was mostly fermented and I bottled it.
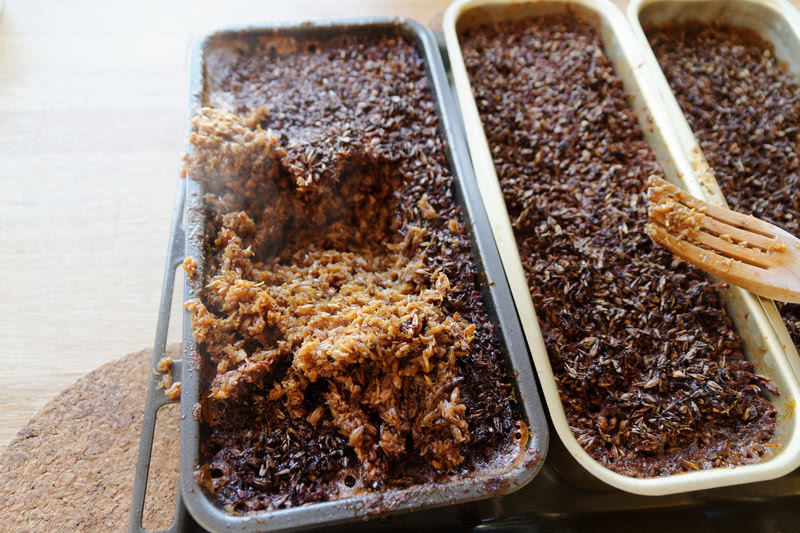
The mash opened up. |
I waited a few days, and then it was time for the big moment: the tasting. And my keptinis tasted like… vossaøl!??! Instantly I knew what had happened. Since the temperature had never been above 100C (212F) I had basically done a 3-hour boil and got the same flavour that the brewers in Voss get from their long wort boils. It’s caramelly, sure, but not with the same depth and intensity.
The reason I didn’t get above 100C (212F) was so obvious I’m embarrassed I hadn’t thought of it beforehand: liquid water under normal conditions never goes above 100C (212F). If it does, it becomes steam and escapes. So as long as there was visible boiling there was still liquid water, which meant the temperature couldn’t be above 100C (212F).
How was that possible at 180C (356F) for 3 hours? Well, evaporation of water actually consumes a lot of energy. A water molecule evaporates when accidental collisions with other molecules give it high enough speed to escape the liquid, but all of that kinetic energy is then lost from the liquid. Other molecules banged into the one that escaped, giving their kinetic energy to the escaping molecule so that it’s knocked loose, taking all that kinetic energy with it. The sum of the kinetic energy of all the molecules is the heat of the liquid.
I concluded that the reason this attempt didn’t work out was that I had too much water, so that it took too long to evaporate it all, and that the temperature wasn’t high enough. So I would just have to try again.
Second attempt
I decided this time I would mash in an insulated coolbox, which would keep the temperature better, so I wouldn’t have to add so much water. And I would bake at 250C (482F), because although that clearly was very hot, the previous attempt showed that the darkening was only on top, anyway.
And I realized I could use my wife’s meat thermometer to constantly measure the center temperature, so that I could see what was going on all the time.
Thus prepared I tried again. This time I needed only about 2-3 liters of water to mash initially, despite having 3.3 kilos (7.28 lb) of malts (that’s what was left). I ended up adding 4 liters in the end, but that still better than last time, when I had 1.45 liters per kilo, since I now had 1.2 liters. Still, this was less of a difference than I’d hoped.
Mash in the oven, with meat thermometer. |
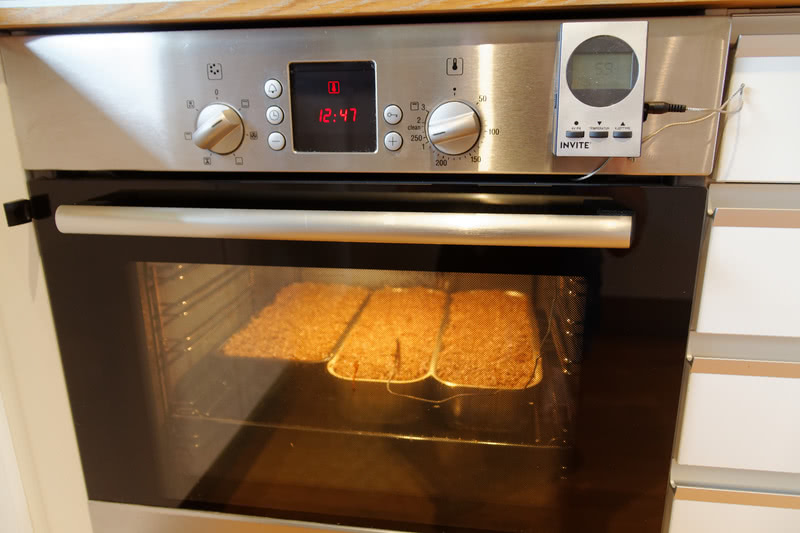
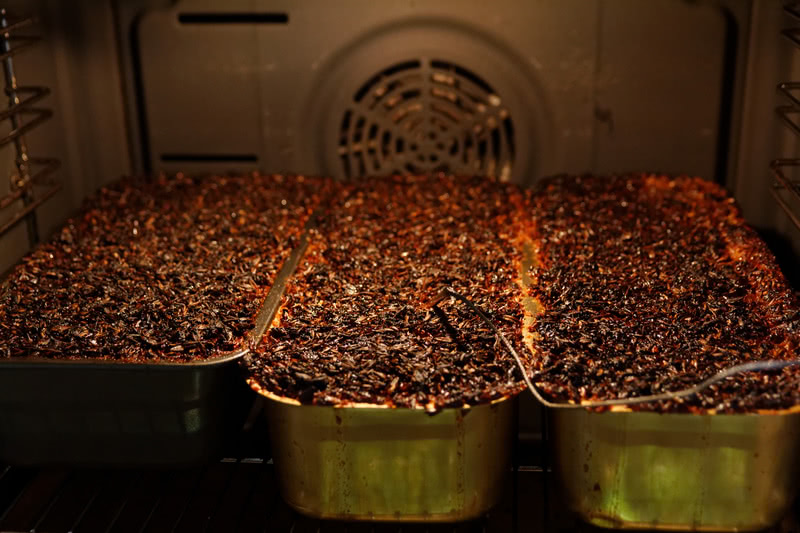
Anyway, after an hour I scooped the boxes full of mash, and put them in the oven, which had been pre-heated to 250C (482F). Then I stuck in the meat thermometer and settled down on the floor in front of the oven.
It took 14 minutes before it started boiling at the edges, but at that point, the center temperature was still only 59C (138F). Interesting! So there was clearly quite a temperature gradient from the edge to the center.
After 30 minutes the center temperature was still only 70C (158F), but the mash started turning brown on top, and it also swelled up, overflowing the boxes. I put a larger pan underneath to catch the spill, so there wouldn’t be so much to clean up afterward. I also made a note for later: don’t fill the boxes completely — leave some room for this swelling.
After 36 minutes some burnt smell started coming off, despite the center temperature being only 75C (167F).
After 45 minutes we were at 94C (201F) and the crust on top was going darker brown.
After 51 minutes the center temperature reached 100C (212F). Now I needed to wait for the water to evaporate out so we could go above and get to the interesting caramelization temperatures.
Mash after 75 minutes. |
So there I sat on the floor in front of the oven, watching the thermometer, waiting. And waiting. And waiting. And waiting. Three hours after I put in the mash, the center temperature was still stuck at 100C (212F). Or actually 101C (214F), according to the thermometer. (I don’t know why.)
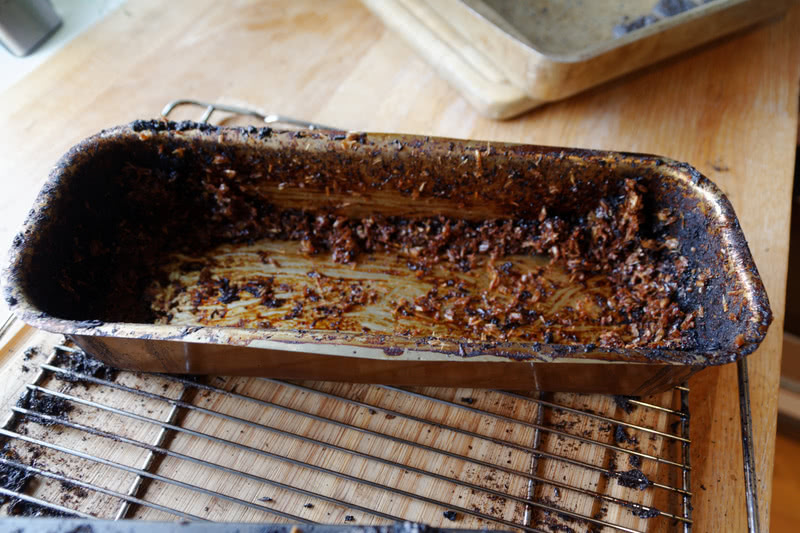
I took out the boxes, and this time the crust was black as soot. But still we hadn’t gone above 100C (212F)! How on earth was I going to get this to work without burning the whole thing to cinders? The Lithuanians had gotten a beautiful brown caramelly crust. Why couldn’t I?
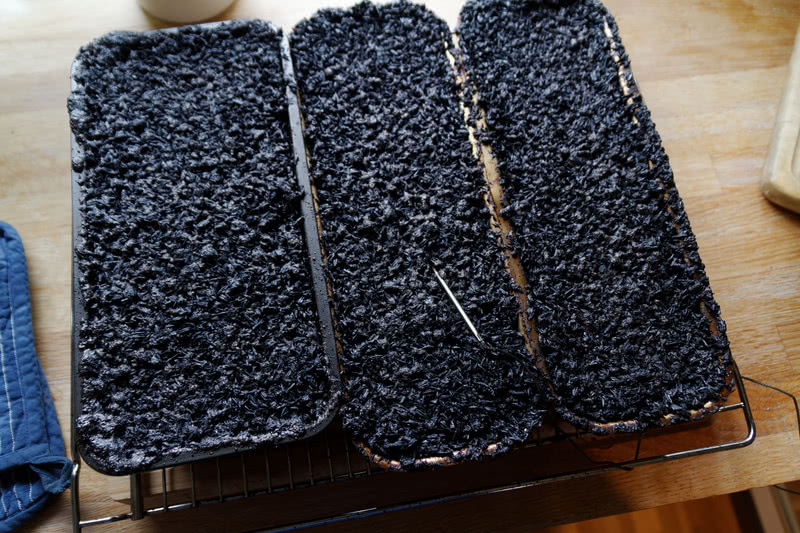
It’s pretty black. |
Just like last time, the black crust on top turned out to be thin, with most of the mash much paler. Although it had definitely darkened a bit from where we started.
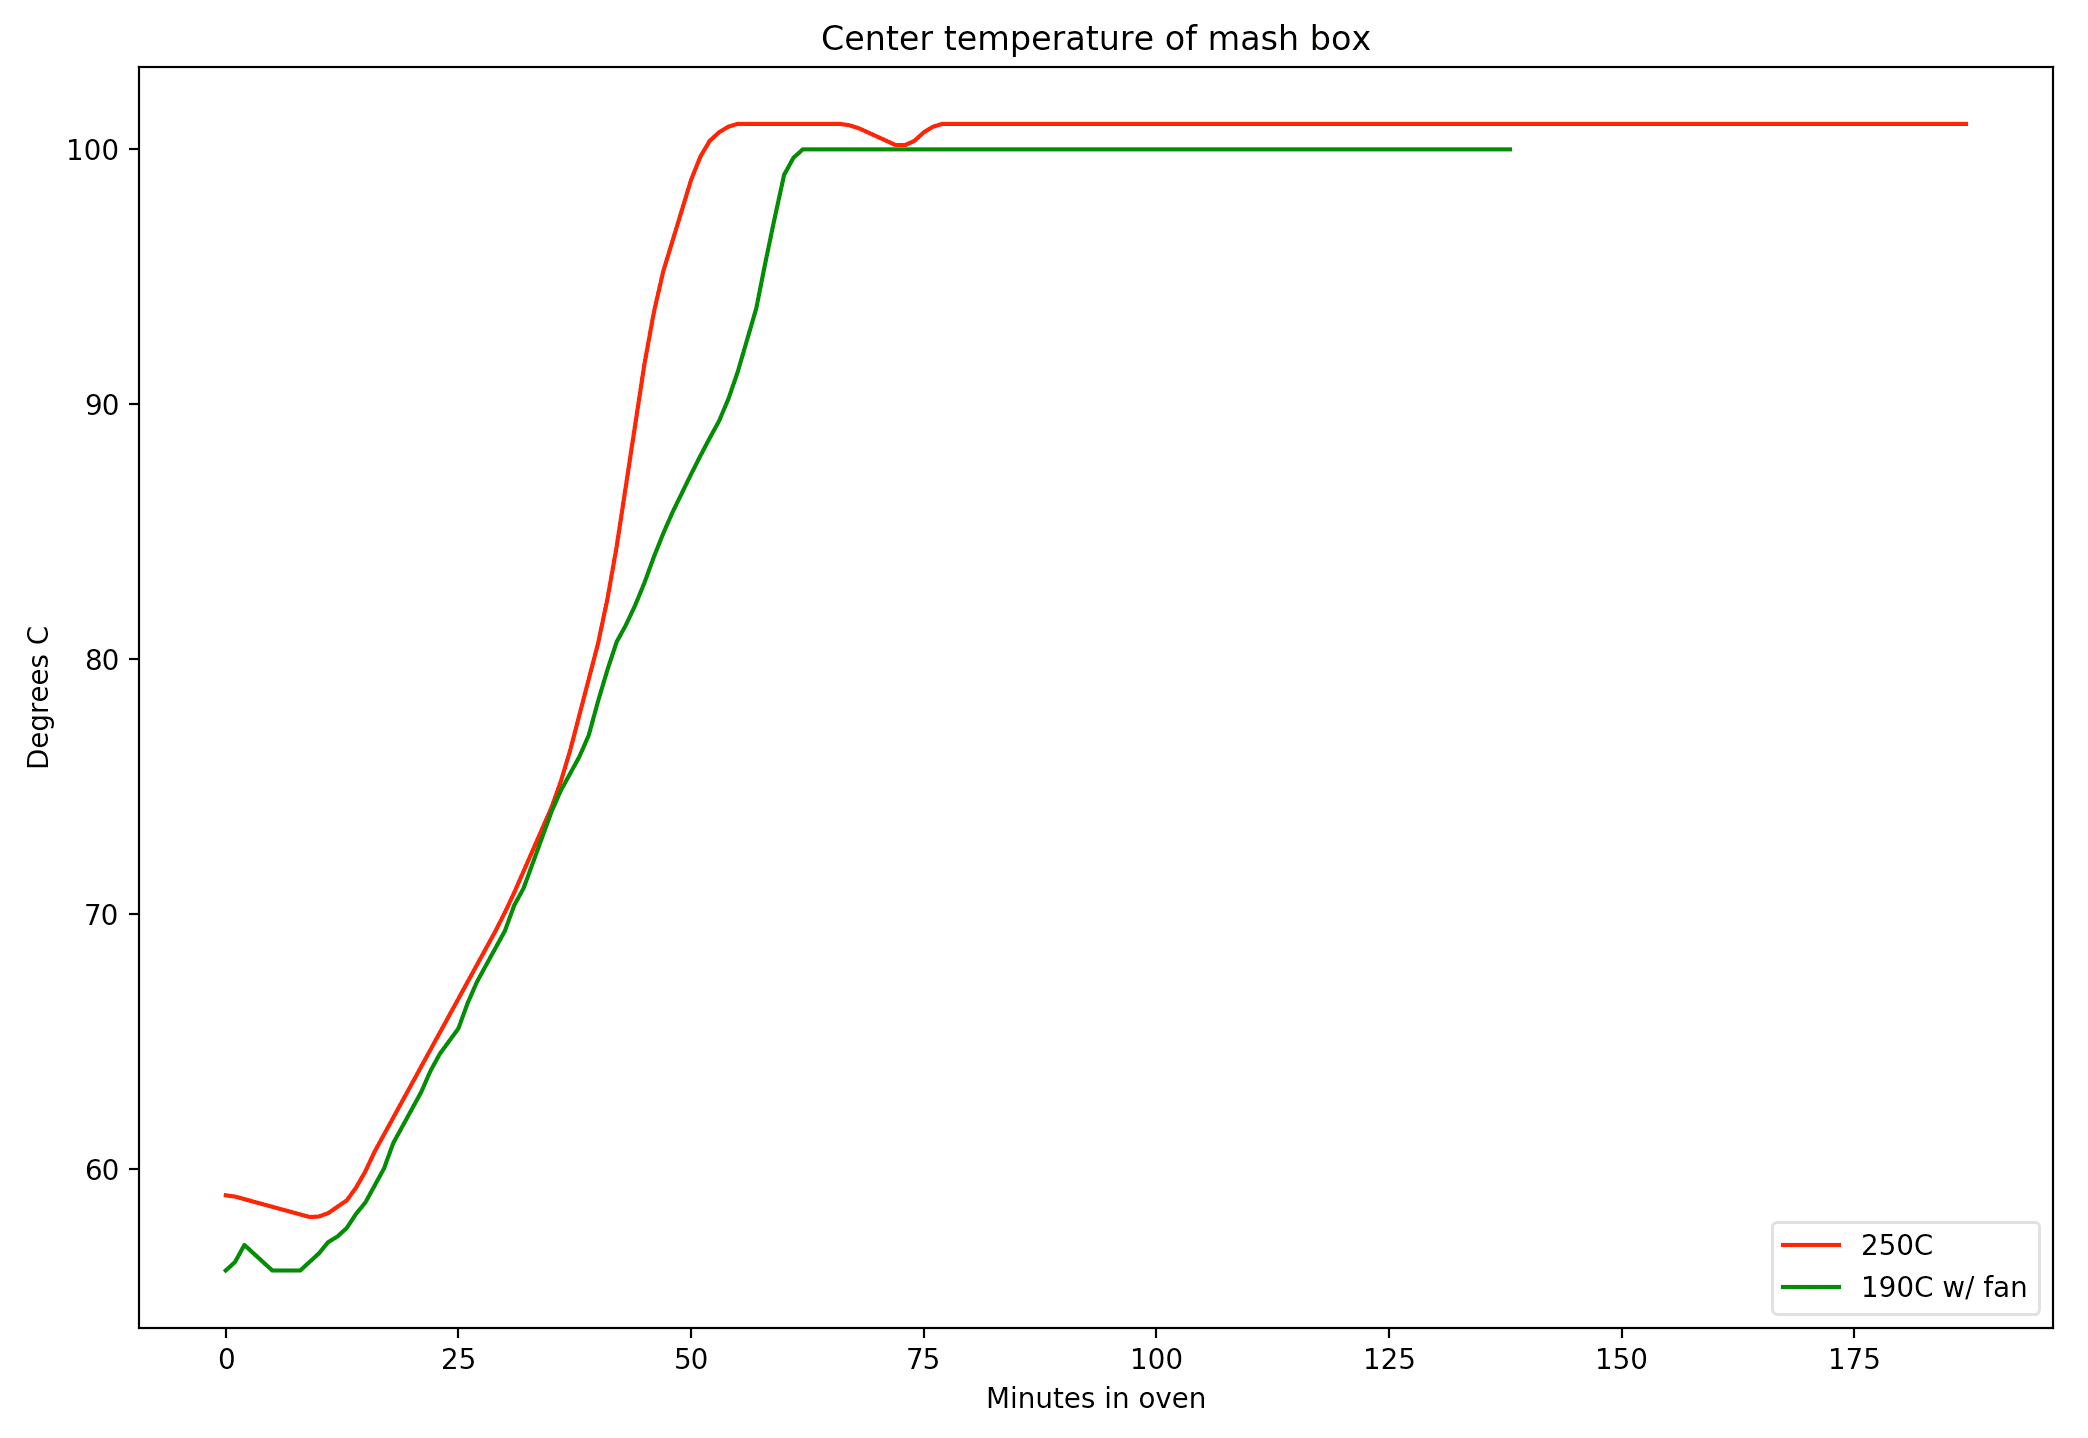
The graph below shows the temperature development.
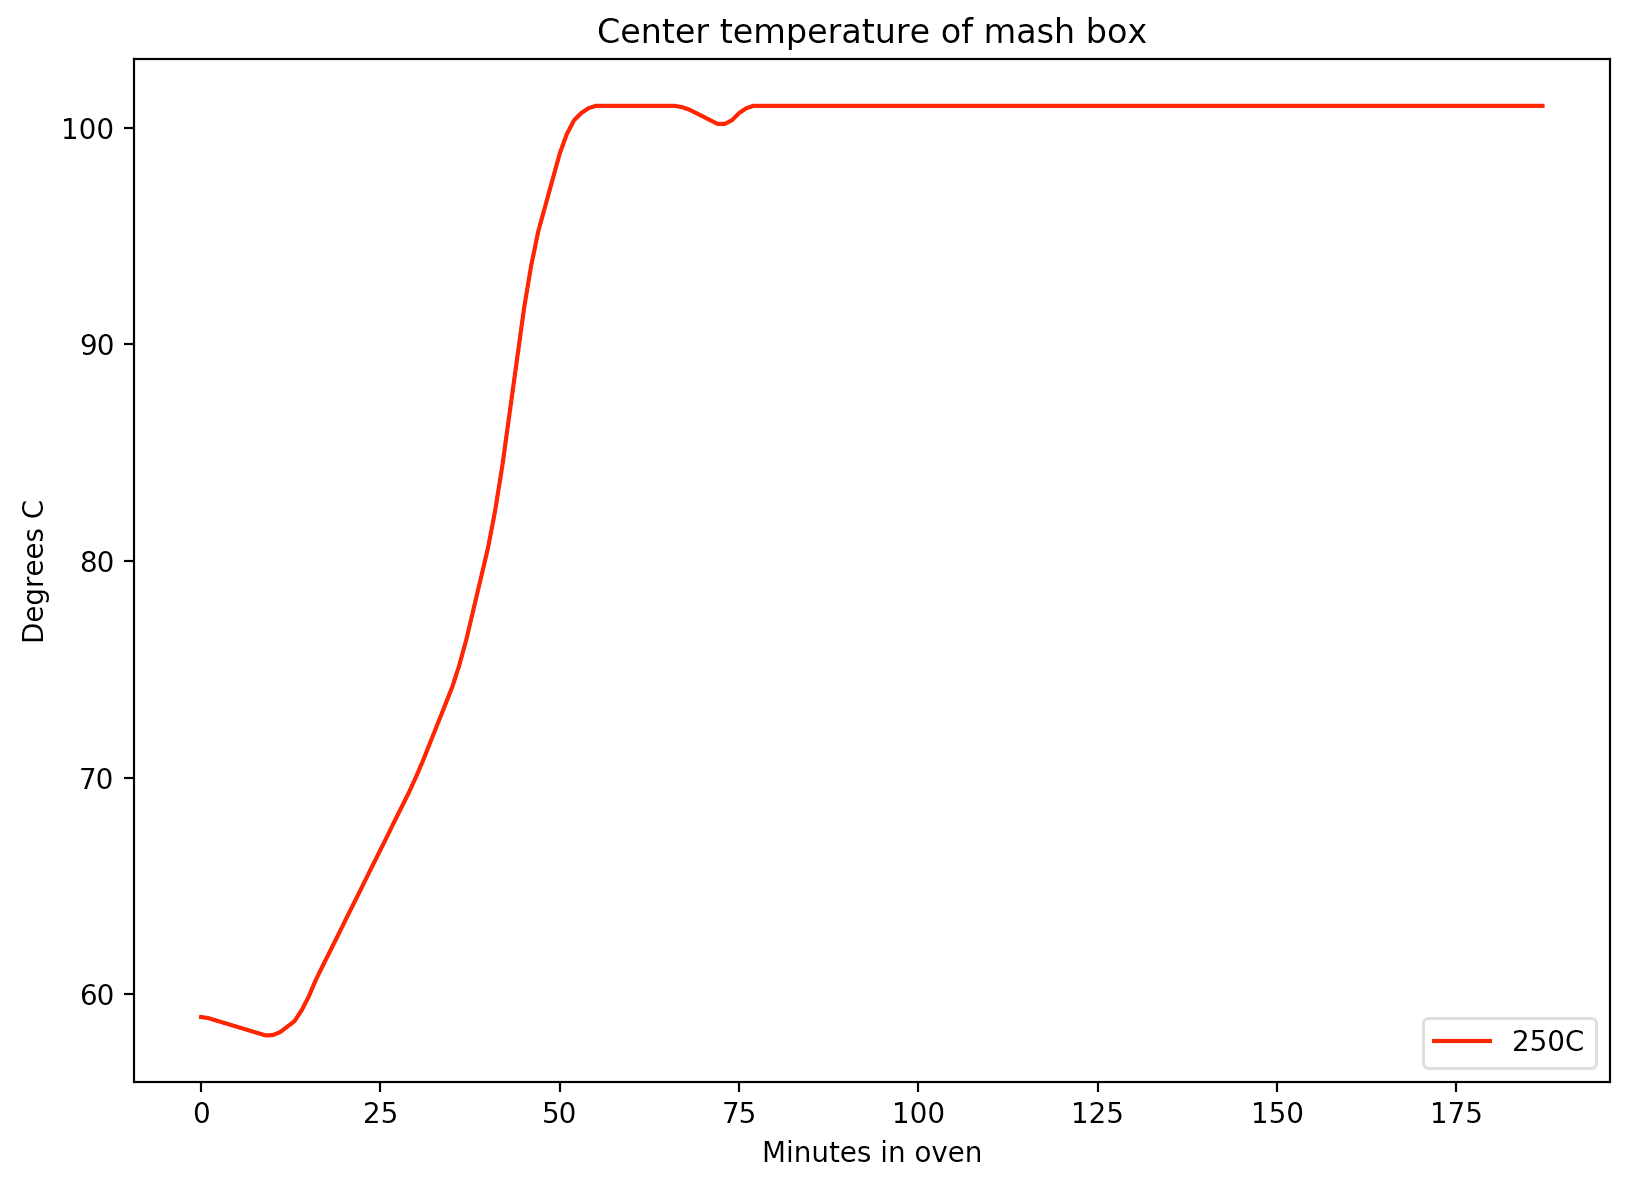
Center temperature graph |
Again the temperature remained stuck at 100C (212F) the whole time.
One interesting thing to note is that the mash went through a kind of second mashing for about 45 minutes. So fermentability should be very good, but somewhat reduced again by the caramelization.
The black layer is not so thick, though. |
I did the hop tea, lautered the wort, and pitched the yeast, and started on the cleaning in between. That turned out to be a nightmare. The high temperatures had burned the sugars to a dark, hard substance
that was very difficult to get off. The non-stick pans weren’t too bad, but the older ones took hours to clean. One of them I was just barely able to clean at all, despite using so much brewer’s cleaning agent that I scraped off some of the surfaces.
Black sticky mess. |
And then there was the pan I’d used to catch the overspill. Sugary wort had dripped down onto this metal heated to 250C (482F) where it had boiled furiously, eventually forming bone dry and rock hard shapes looking more like congealed lava than anything edible. This stuff was so hard I seem to have unintentionally invented a new building material. The process for producing it is perhaps not cost-effective, but you do get beer as a side-effect, so …
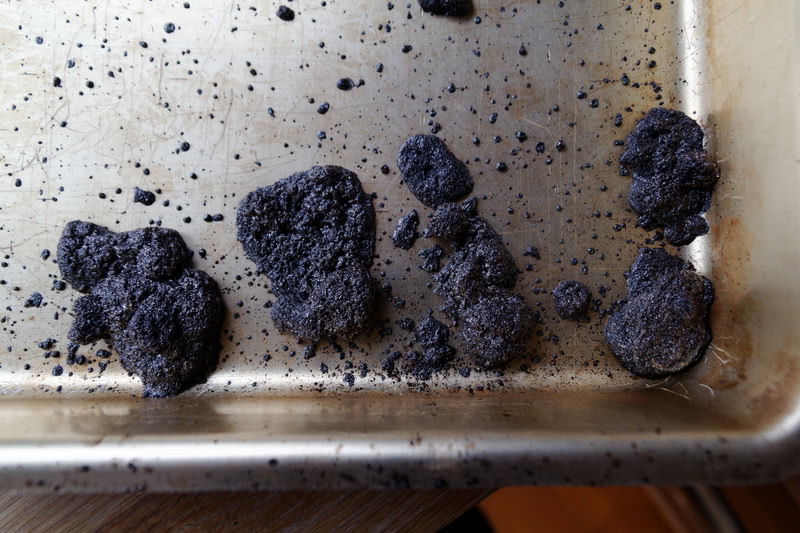
Sugar “art”. |
I didn’t even try to clean up this pan. I told my wife I’d buy a new one and just threw it away. (I want to record my gratitude for her being understanding about this.)
Eventually, the beer was finished fermenting and I could taste it, gingerly. I was fully expecting to find that I had brewed undrinkable sooty water, but the beer was actually quite nice. It didn’t really have the caramel flavour, but an odd, toasty, minerally flavour. It wasn’t what I’d tried to brew, but not bad at all. That was reassuring, because it helped convince me that brewing this type of beer isn’t that difficult. It may be tricky to control the flavours
precisely, but you do get something interesting and drinkable even if you overdo the baking.
Third attempt
After having gone too low and then too high without ever getting the center temperature above 100C (212F), I had some thinking to do to figure out what was missing. In the end, I decided the problem might be that the duonkepis oven has an outlet for the smoke and hot air through the chimney, while our oven is not that well ventilated by default. So perhaps a lower temperature with the fan turned on, in order to vent the humidity out?
I decided to try 190C (374F) with the fan on. This time mashing and all of that went pretty quickly, since I was getting used to the drill. Into the oven it went, and:
Center temperature graph for attempts two and three |
Still no luck getting above 100C (212F). (And why did the thermometer show 100C this time, but 101C (214F) last time? No idea, really.)
The inside of the oven was clearly quite wet the whole time. My glasses fogged up when I opened the oven, there was visible condensation on the lamp inside the oven and visible boiling went on for the first 1.5 hours. In fact, this time it boiled so furiously it spattered the door and walls in sugary liquid. I was glad I’d put some extra large pans underneath to catch any spill, because although the swelling mash did not flow over this time, the boil was so strong that some of the wort did.
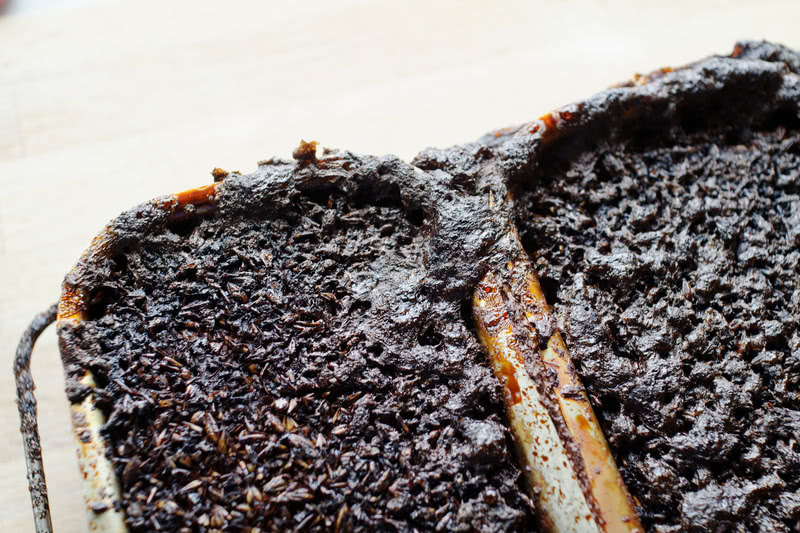
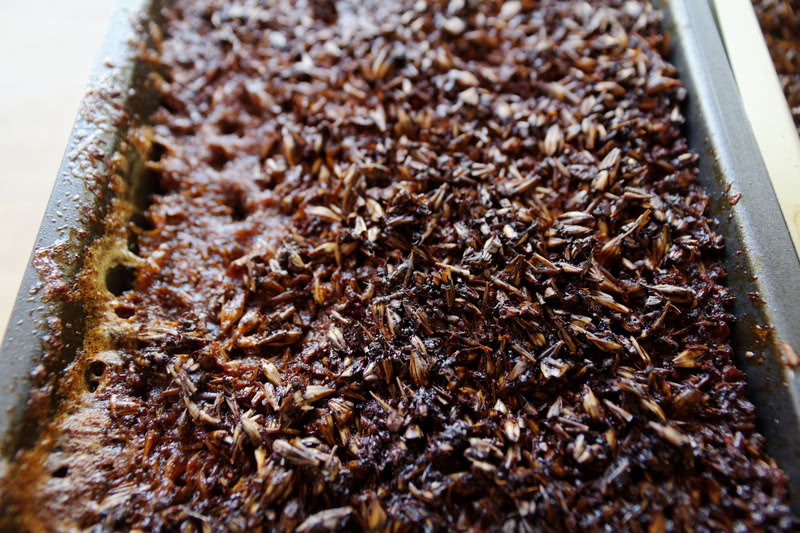
Very dark brown mash with caramelized sugar on top. |
In fact, I seemed to be getting caramelization in this sugary, sticky layer on top of the mash. Once the top layer started turning really dark brown, I stopped, figuring it would be a bad idea to burn away any caramel I might have created.
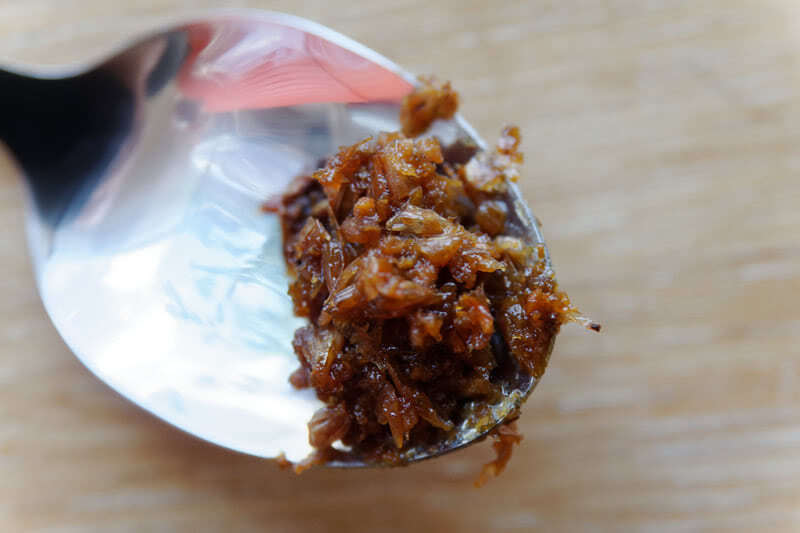
Once I broke the crust I found that I also seemed to be getting caramelization along the edges of the boxes. The cleaning was also easier this time. The boxes were sticky and gooey, but this was the kind of sugars that easily give in to hot water and not the basalt-like black stuff from the previous attempt. So this time it was looking promising.

Sticky sugary stuff |
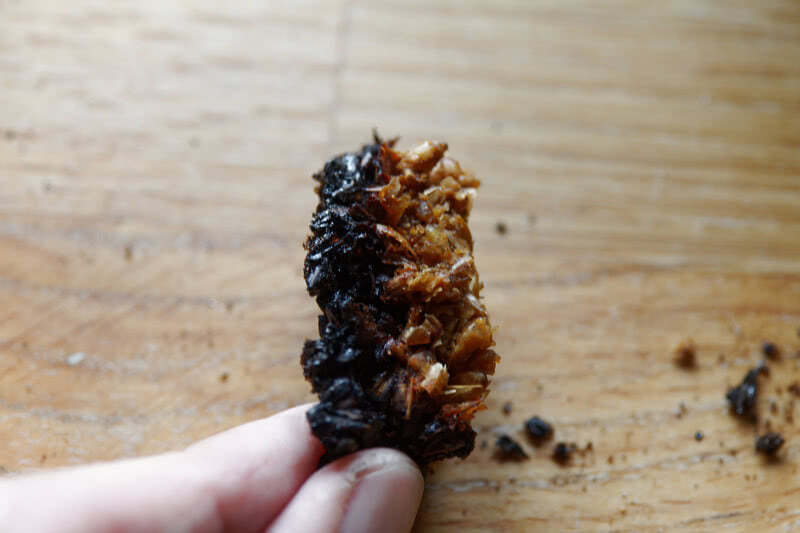
And after fermentation, I did indeed find that this attempt was my closest yet. There was a clear caramelly flavour, distinctly different from the caramel flavour of a vossaøl, although without the deep intensity of the original.
I’m beginning to suspect that another aspect of the traditional oven may be important: the brickwork, which stores the heat for a long time. The mash boxes are placed directly on the very hot bricks, and this may also contribute to the flavour. Anecdotal reports from other brewers indicate the same. So if you have a pizza oven that may be better suited for keptinis than an ordinary electric oven. And if you do have an electric oven, a pizza stone, quarry tile, or something similar to place the boxes on may also be a good idea.
However, one thing I definitely learned was that you get an interesting beer pretty much no matter what you do.
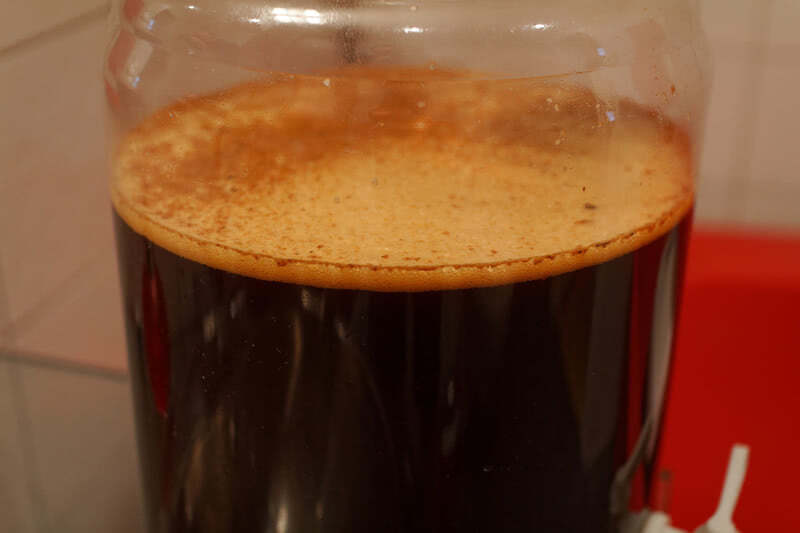
Fermenting keptinis |
For all of these beers I ended up with a pretty high final gravity, but this could be because the #20 Espe I was using was not really as vigorous as it should have been. I’m not sure. I reused the same yeast from batch to batch, in order to get experience with that as well, which means that whatever it was that made these fermentations so sluggish may simply have been a problem with the frozen yeast I started with. Or it may have been something about keptinis wort. I simply don’t know.
Summing up
The actual recipe can be found at the bottom of the original blog post, but I think it’s useful to summarize the main things I learned:
- If your partner has strong feelings about the oven pans, maybe start by discussing the project with her/him.
- The best temperature seems to be 190C with the fan on, until the top starts heading toward black.
- Use small pans: the reactions you’re looking for happen around the edges.
- Try to keep the amount of water in the mash to a minimum.
- Use a pizza stone/quarry tile if you can.
- Leave room for the mash to swell.
- Put something underneath the pans to catch stuff that boils
over. - Stop once the top starts going really dark brown. (Although you don’t have to. Some keptinis has traditionally been baked totally black.)
And, last but not least, don’t worry too much about burning the mash. You get interesting flavours anyway.
Keptinis: